Have trouble with your Sony WF-1000XM4 earbuds not charging? This frustrating issue can disrupt your audio experience and leave you searching for solutions.
In this guide, we’ll provide you with practical troubleshooting steps to help you resolve the problem and get your earbuds back in working order.
Contents
- 1 Fixing Sony WF-1000XM4 Not Charging –
- 2 1. Check the Power Outlet
- 3 2. Verify the Charging Source Power
- 4 3. Inspect the Charger
- 5 4. Check if the Battery is Fully Charged
- 6 5. Look for Physical Damage
- 7 6. Take Them Out of Hibernation Mode
- 8 7. Clean the Charging Port
- 9 8. Clean the Charging Contacts
- 10 9. Consider Temperature
- 11 10. Test with a Wireless Charging Pad
- 12 11. Reset the Charging Case
- 13 12. Reset the Earbuds
- 14 13. Update Firmware
- 15 14. Consider Replacing the Battery
- 16 FAQs
- 17 Why is my Sony WF 1000XM4 not charging?
- 18 How do I reset my Sony WF 1000XM4 charging case?
- 19 Why are my Sony headphones not charging?
- 20 Why is my WF 1000XM4 not powering on?
- 21 Why is my WF 1000XM4 case flashing red and not charging?
- 22 What to do if my Sony headphones won’t turn on?
- 23 Why is my Sony WF 1000XM3 not charging in the case?
- 24 Why is there no red light when charging Sony headphones?
Fixing Sony WF-1000XM4 Not Charging –
Let’s go through the following troubleshooting steps one by one to get your earbuds charging properly again.
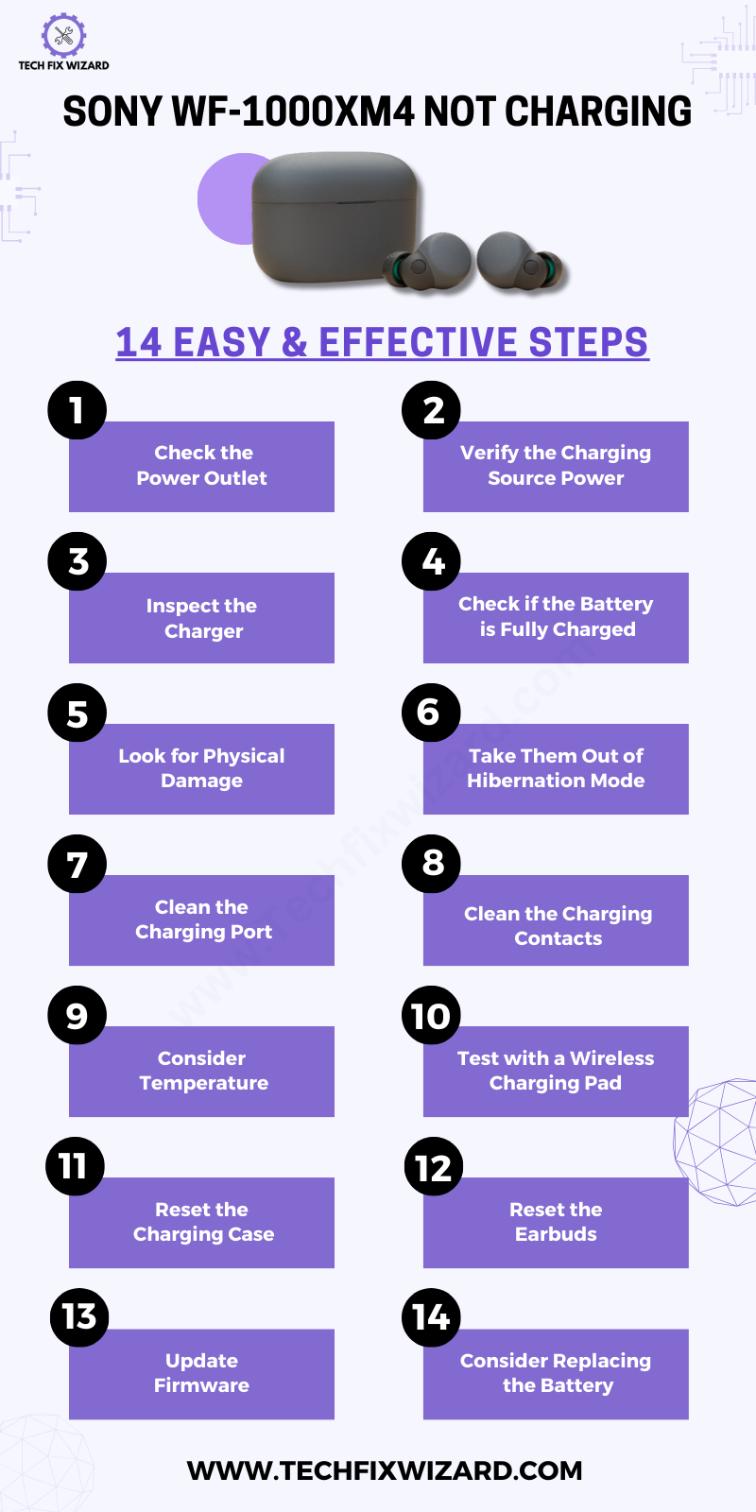
1. Check the Power Outlet
Begin by inspecting the power outlet you are using. Ensure that it is functional and delivers power as expected.
If you encounter any issues with the outlet, such as no power or irregular power supply, it can hinder the charging process.
In such cases, it’s a good idea to explore alternative power sources, like connecting your charging cable to a laptop’s USB port.
This step helps eliminate potential problems originating from a faulty power outlet, allowing you to focus on resolving the charging issue effectively.
2. Verify the Charging Source Power
After ensuring the power outlet is functional, proceed to confirm that the charging source you are using provides the correct power output.
The ideal power output for your Sony WF-1000XM4 earbuds is around 5V and 0.5A. Using a power source with higher voltage or amperage might not be suitable for your device and could trigger safety mechanisms.
This step serves as a foundational check to ensure that your chosen power source is compatible with your earbuds, setting the stage for effective troubleshooting.
3. Inspect the Charger
With a compatible power source in place, the next step is to thoroughly examine the components responsible for delivering power to your earbuds.
Carefully inspect the charging cable, and adapter for any visible physical damage or signs of wear. Damaged components can hinder proper charging, making it essential to rule out such issues.
By taking this step, you’re systematically working through the charging process, starting from the source and moving towards the earbuds, ensuring each element is in working order.
Also, Read:
4. Check if the Battery is Fully Charged
Next, check if your earbuds’ battery is already at full capacity. Using a dedicated app, assess the battery status to confirm that it’s not already fully charged.
This step helps rule out the possibility of unnecessary charging and ensures you’re focusing your efforts in the right direction.
5. Look for Physical Damage
As you continue troubleshooting, closely examine your earbuds for any signs of physical damage or wear and tear.
Physical damage can significantly impact their functionality and charging capabilities.
By conducting this visual inspection, you’re addressing potential issues that might not be immediately apparent and taking proactive steps to ensure your earbuds are in optimal condition.

Quick Reads:
- JLab Headphones Not Charging – 8 Steps To Resolve The Issue
- Indy Evo Not Charging – [FIXED] 8 Steps To Try
6. Take Them Out of Hibernation Mode
If your earbuds have been dormant for an extended period, they may have entered a hibernation mode to preserve battery life.
To revive them, initiate a continuous 11-12 hour charging session. This action aims to reawaken the battery and ensure it’s responsive to charging efforts.
It’s a proactive measure to address potential issues caused by prolonged inactivity.
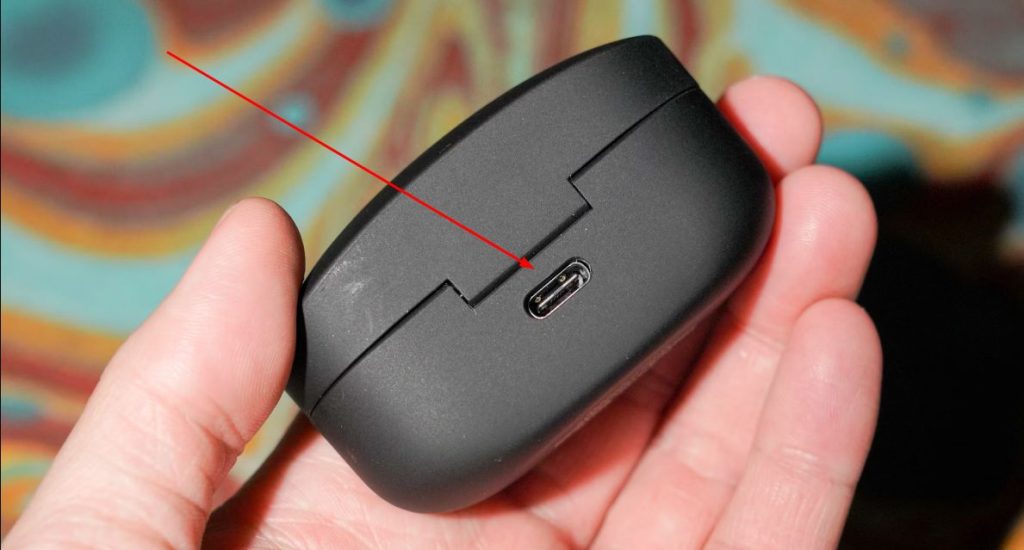
7. Clean the Charging Port
A clean charging port is essential for effective charging. Make sure both the earbuds’ and the case’s charging ports are free from debris and dirt that could obstruct the charging process.
Clearing any obstructions ensures a smooth and uninterrupted flow of power to your earbuds, eliminating potential obstacles to successful charging.
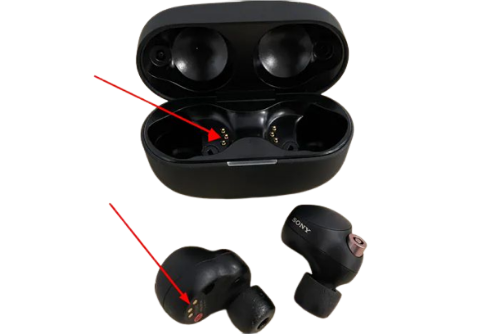
8. Clean the Charging Contacts
To further enhance the charging process, take the time to clean the charging contacts on both the earbuds and the case.
This step guarantees a secure and effective electrical connection, optimizing the charging performance. Maintaining these contacts in pristine condition is vital for hassle-free charging and proper functionality.
9. Consider Temperature
Next, take temperature into consideration. Earbuds are required to be charged within an ideal temperature range of 15°C to 35°C (59°F – 95°F) to achieve optimal charging results.
Charging outside of this range may lead to less efficient charging or even no charging at all. In such situations Maintain the right temperature to ensure that your earbuds can absorb and store energy effectively.
10. Test with a Wireless Charging Pad
One thing that you can try to pinpoint the issue is to charge your earbuds through a wireless charging pad.
If your earbuds charge successfully on the pad, it suggests that the earbuds themselves are functioning correctly, and the problem may lie with the charging components like cables or adapters.
However, if they still don’t charge on the pad, it’s an indication that your earbuds may require a case reset to resolve the issue.
11. Reset the Charging Case
Sometimes, when your Sony WF-1000XM4 earbuds are experiencing charging issues or connectivity glitches, a reset of the charging case can work wonders.
This process is surprisingly straightforward and won’t disrupt your Bluetooth pairings, ensuring that your device connections remain smooth and uninterrupted.
Here’s how you can do it:
- Connect the case to an AC outlet using the supplied USB cable and AC adapter.
- Place the left/right earbud in the case and securely close the lid.
- Open and close the case lid rapidly 5 times within a span of 20 seconds.
- Wait for the indicator on the charging.
- It will flash red.
- After the reset, observe the indicator flashing green four times.
- Repeat the same reset process for the other earbud as well.
You Might Find Helpful:
- Bose QuietComfort Earbuds Not Charging – 9 Solutions To Consider
- JLab Go Air Not Charging – Try These 6 Easy Solutions
12. Reset the Earbuds
To perform a reset of your earbuds:
- Begin by placing both earbuds inside the charging case.
- Next, simultaneously press and hold the sensor on both earbuds for a duration of 10 seconds.
- Release your fingers promptly when you see the indicator on the case flash red.
It typically occurs a few seconds after initiating the touch-and-hold action.
13. Update Firmware
Next, try Updating the firmware of your device it can potentially resolve non-charging problems by addressing software-related issues that may be affecting the charging process.
Firmware updates often include bug fixes and optimizations, and they can improve the overall functionality of your device, including its charging capabilities.
Here’s how to do it through Sony App
- Download the Sony | Headphones Connect app from the App Store or Google Play Store.
- Open the app and create an account or sign in with your existing account.
- Connect your earbuds to your phone or tablet.
- In the app, tap on the “Settings” icon.
- Tap on “System”.
- Tap on “Software Update”.
If the [Automatic download of software] setting is enabled (default setting), the update software will start downloading and transferring automatically.
If the automatic download setting is disabled, follow these steps:
- Tap on “Check for Updates”.
- If an update is available, tap on “Download”.
- Once the update is downloaded, tap on “Install”.
- The earbuds will restart and the update will be installed.
You can also update the headset software by downloading the update software from the server to the smartphone on which the “Sony | Headphones Connect” app is installed. Here are the steps:
- Open the Sony | Headphones Connect app.
- Connect your earbuds to your phone or tablet.
- In the app, tap on the “Settings” icon.
- Tap on “System”.
- Tap on “Software Update”.
- Tap on “Import update file”.
- Select the updated file that you downloaded.
- The earbuds will restart and the update will be installed.
14. Consider Replacing the Battery
If the issue persists consider replacing the battery as a solution. To embark on this task, ensure you have the essential tools, including a heat gun, a spudger tool, and a replacement battery that matches the specifications of your earbuds.
The replacement process involves several steps:
- Use the heat gun to gently soften the adhesive along the earbud’s seam.
- Carefully pry open the earbud, taking care to avoid damage.
- Disconnect the daughterboard and its ribbon cables.
- Remove the old battery.
- Insert the new battery, ensuring proper alignment.
- Reattach the daughter board and secure the ribbon cables.
- Apply electronic adhesive around the edge to secure the earbud halves.
- Firmly press the halves together to bond the adhesive.
- Remove any excess adhesive.
- Place the earbud in its charging case to verify proper charging and functionality.
- If necessary, repeat the same battery replacement
Consider Reading:
- How To Fix Oppo Enco W11 Not Charging – 7 Quick Troubleshooting Steps
- Jlab Earbuds Not Charging – Try These 7 Steps
FAQs
Why is my Sony WF 1000XM4 not charging?
If your Sony WF 1000XM4 earbuds are not charging, the issue may be related to the charging pins on the earbuds or the case being dirty or obstructed. Ensure they are clean and make proper contact. Also, check the charging cable and adapter for any damage.
How do I reset my Sony WF 1000XM4 charging case?
To reset the charging case of your Sony WF 1000XM4, simply connect it to a power source using the provided USB-C cable. The case will reset when you see the indicator lights flash.
Why are my Sony headphones not charging?
Sony headphones not charging can be due to a variety of reasons, including a faulty cable, adapter, or dirty charging ports. Ensure all connections are clean and functional, and try using a different cable and adapter if necessary.
Why is my WF 1000XM4 not powering on?
If your WF 1000XM4 is not powering on, make sure they are sufficiently charged. Additionally, check for any firmware updates and follow the reset procedure in the user manual if needed.
Why is my WF 1000XM4 case flashing red and not charging?
A red flashing light on the WF 1000XM4 case may indicate a low battery level. Charge the case using the supplied cable and adapter until the light turns off to ensure the earbuds charge properly.
What to do if my Sony headphones won’t turn on?
If your Sony headphones won’t turn on, first check if they are charged. Try resetting them. If the issue persists, consult the user manual or contact Sony support.
Why is my Sony WF 1000XM3 not charging in the case?
If your Sony WF 1000XM3 is not charging in the case, ensure that the charging pins on the earbuds and the case are clean and aligned correctly. Try reseating the earbuds and make sure the case has sufficient charge.
Why is there no red light when charging Sony headphones?
The absence of a red light while charging Sony headphones could indicate several things. Ensure the charging cable, adapter, and connections are functioning correctly. Some Sony headphones may have different LED behaviors, so consult the user manual for specific information.

John Paul is a tech enthusiast dedicated to troubleshooting. He is passionate about fixing glitches, simplifying complexities, and empowering others in the digital realm.