Are your AirPods not holding a charge for long? It can be a frustrating experience!
AirPods are renowned for their wireless convenience and long battery life, but if you find that your AirPods’ battery is draining quickly it can be very inconvenient but worry not we’ve got you covered!
In this article, we will provide you with some troubleshooting steps to help you address the Airpods Not holding a charge for long.
Contents
- 1 Troubleshooting AirPods Not Holding A Charge For Long
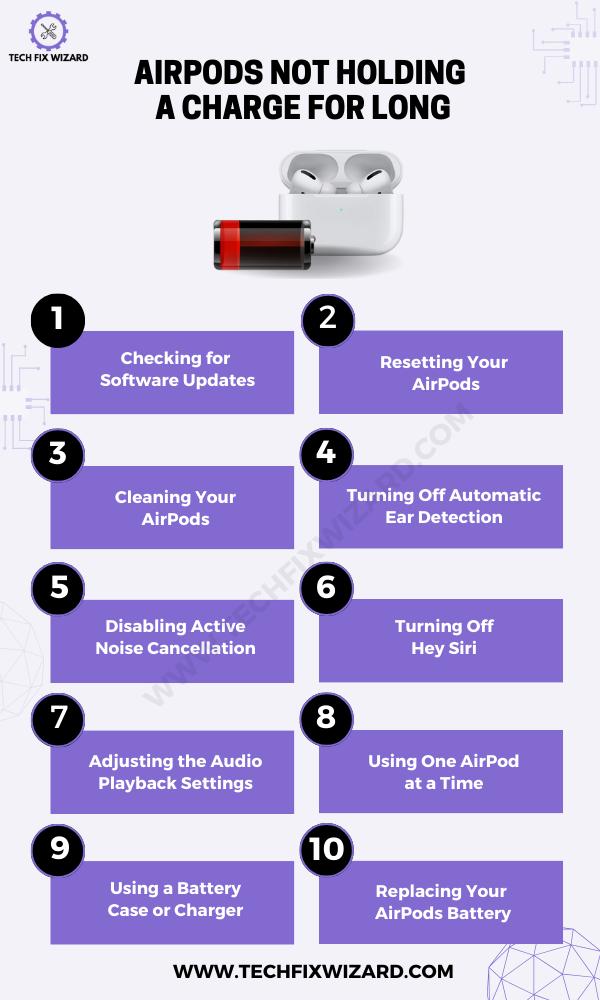
- 2 1. Checking for Software Updates
- 3 2. Resetting Your AirPods
- 4 3. Cleaning Your AirPods
- 5 4. Turning Off Automatic Ear Detection
- 6 5. Disabling Active Noise Cancellation
- 7 6. Turning Off Hey Siri
- 8 7. Adjusting the Audio Playback Settings
- 9 8. Using One AirPod at a Time
- 10 9. Using a Battery Case or Charger
- 11 10. Replacing Your AirPods Battery
- 12 Seeking Professional Help
- 13 FAQs
- 14 Q1. Why are my AirPods not holding a charge for long?
- 15 Q2. How can I improve the battery life of my AirPods?
- 16 Q3. How often should I charge my AirPods?
- 17 Q4. Can I use a different charging cable or charger for my AirPods?
- 18 Q5. Why do my AirPods drain the battery even when not in use?
- 19 Q6. How can I check the battery health of my AirPods?
- 20 Q7. Should I store my AirPods in the charging case when not in use?
- 21 Q8. Can software updates improve the battery life of AirPods?
- 22 Q9. Why do my AirPods lose battery even when not connected to any device?
- 23 Q10. Can using noise cancellation or transparency mode drain the AirPods’ battery faster?
- 24 Q11. Is there a warranty for AirPods with battery issues?
- 25 Conclusion
Troubleshooting AirPods Not Holding A Charge For Long
Following troubleshooting solutions can help you resolve AirPods not holding a charge for long issues. Let’s dive into it!
1. Checking for Software Updates
You can easily extend your AirPods’ battery life by keeping them up-to-date with the latest software updates.
Apple frequently releases new firmware for AirPods, which not only improve their performance but also fix any issues related to battery life.
| Step | Instructions |
|---|---|
| Step 1 | Connect your AirPods to your iPhone or iPad. |
| Step 2 | Open the Settings app on your iPhone or iPad. |
| Step 3 | Select “General” from the list of options. |
| Step 4 | Tap on “About.” |
| Step 5 | Choose “AirPods” from the available options. |
| Step 6 | Check the current firmware version of your AirPods. |
| Step 7 | If an update is available, you will be prompted to download and install it. |
| Step 8 | Make sure both AirPods are in their charging case and connected to a power source during the update process. |
Once the update is complete, you should notice an improvement in battery life and overall performance.
Also Read: Troubleshooting AirPods Double Tap Not Working – 7 Quick Fixes
2. Resetting Your AirPods
A quick reset of Airpods may be just what you need to get them back to optimal performance. Resetting your AirPods can help resolve any software bugs or glitches that may be causing battery drain issues.
| Step | Instructions |
|---|---|
| Step 1 | Ensure AirPods are connected to your device. |
| Step 2 | Go to the Bluetooth settings on your device. |
| Step 3 | Select ‘Forget This Device’ and confirm. |
| Step 4 | Place both AirPods back into their case and close the lid. |
| Step 5 | Leave AirPods in the case for at least 15 seconds. |
| Step 6 | Open the case and locate the setup button on the back. |
| Step 7 | Press and hold down the setup button until the status light flashes amber. |
| Step 8 | AirPods are now ready to be reconnected. |
| Step 9 | Reconnect AirPods to your device by following the initial pairing process. |
It’s a simple yet effective solution that can save you from having to replace your AirPods entirely or constantly charge them throughout the day.
3. Cleaning Your AirPods
Cleaning your AirPods can help extend their battery life and improve overall sound quality. Here are some tips on how to properly clean your AirPods:
| Step | Instructions |
|---|---|
| Step 1 | Use a soft-bristled brush or microfiber cloth to wipe the exterior of the AirPods and charging case gently. |
| Step 2 | Use a dry cotton swab or toothbrush to remove buildup from the charging contacts on both the AirPods and the charging case. |
| Step 3 | Clean the metal contacts on the charging case. |
| Step 4 | Consider using protective covers for your AirPods and case to prevent future dirt and debris buildup. |
By taking these simple steps to clean your AirPods regularly, you can ensure they continue holding a charge for longer periods of time and deliver high-quality sound when you need it most!
Also Read:
- One AirPod Not Charging – Try These 9 Solutions
- AirPods Max Not Charging – Get Them Fixed In 8 Simple Steps
4. Turning Off Automatic Ear Detection
When you take out one of your AirPods, the music automatically pauses, but did you know that you can turn this feature off? This automatic ear detection is a great feature to have, especially if you’re someone who frequently removes their AirPods.
However, if your AirPods are not holding a charge for long, turning off this feature could help conserve battery life.
Here are the steps on how to turn off automatic ear detection in AirPods:
On iPhone, iPad, or iPod touch:
| Step | Instructions |
|---|---|
| 1. | Ensure your AirPods are connected to your device. |
| 2. | Open the Settings app on your iPhone, iPad, or iPod touch. |
| 3. | Tap on Bluetooth. |
| 4. | Locate and tap on the name of your AirPods. |
| 5. | Scroll down and find Automatic Ear Detection. |
| 6. | Toggle the switch next to Automatic Ear Detection to Off. |
On Mac:
| Step | Instructions |
|---|---|
| 1. | Ensure your AirPods are connected to your device. |
| 2. | Click the Apple menu at the top left corner of the screen. |
| 3. | Select System Preferences from the dropdown menu. |
| 4. | Click on Bluetooth. |
| 5. | Locate and click the name of your AirPods in the list of connected devices. |
| 6. | Click on Advanced. |
| 7. | Uncheck the box next to Automatic Ear Detection. |
Also Read:
- Left AirPod Not Charging – 8 Steps On How To Fix It
- AirPods Microphone Not Working – Fixed In 10 Easy Steps
5. Disabling Active Noise Cancellation
Active noise cancellation is a feature that uses microphones to block out external sounds but by disabling active noise cancellation, you can prolong the battery life of your AirPods since this feature consumes more power than normal use.
There are a few ways to disable Active Noise Cancellation (ANC) in AirPods.
1. Using Control Center:
| Step | Instructions |
|---|---|
| 1. | Open Control Center on your iPhone, iPad, or iPod touch. |
| 2. | Tap and hold the volume slider. |
| 3. | Tap Noise Cancellation |
2: Using the Settings app
| Step | Instructions |
|---|---|
| 1. | Open the Settings app on your iPhone, iPad, or iPod touch. |
| 2. | Tap on Bluetooth. |
| 3. | Locate and tap the name of your AirPods in the list of connected devices. |
| 4. | Tap on Noise Control. |
| 5. | Tap Off to disable the noise control feature. |
6. Turning Off Hey Siri
To optimize the battery life of your AirPods Pro, it’s recommended that you turn off Hey Siri when it’s not necessary.
| Step | Instructions |
|---|---|
| 1. | Open the Settings app. |
| 2. | Tap on Siri & Search. |
| 3. | Toggle off Listen for “Hey Siri”. |
7. Adjusting the Audio Playback Settings
Now that you’ve turned off Hey Siri, let’s look at another way to extend the battery life of your AirPods. Adjusting the audio playback settings can help conserve power and improve overall performance.
| Step | Instructions |
|---|---|
| 1. | Try lowering the volume on your AirPods. The louder the volume, the more power they consume. |
| 2. | Disable any sound enhancements or equalizer settings on your device. |
| 3. | Enable mono audio playback by going to Settings > Accessibility > Audio/Visual and toggle on ‘Mono Audio’.
This setting combines both left and right channels into a single channel, reducing power consumption by up to 50%. |
By making these adjustments to your audio playback settings, you should notice an improvement in how long your AirPods hold a charge.
8. Using One AirPod at a Time
Using only one AirPod at a time can help conserve battery life and improve overall performance, while also providing the option for a more focused audio experience.
When you use both AirPods simultaneously, they drain the battery faster and reduce the amount of listening time you get on a single charge.
To use only one AirPod, simply remove one from the charging case and place it in your ear. You can choose which AirPod to use based on personal preference or switch between them as needed throughout the day.
When using just one AirPod, be sure to adjust your audio playback settings accordingly so that all sound is directed through that single earpiece.
9. Using a Battery Case or Charger
Investing in a battery case or charger is a good idea when it comes to troubleshooting AirPods not holding a charge for long
A case or charger can provide extra juice to your AirPods and keep them powered up for longer periods.
There are many types of battery cases and chargers available in the market. One popular option is the Apple Smart Battery Case, which not only charges your AirPods but also protects them from scratches and drops.
Another option is a portable charging dock that can hold multiple charges for your AirPods throughout the day.
10. Replacing Your AirPods Battery
Over time, the battery in your AirPods may start to degrade, resulting in shorter battery life. It can be one of the many reasons that your AirPods not holding a charge for long.
If you are thinking of replacing the battery, don’t fret, as it is a simple process that can be done at home with a few basic tools.
Materials:
- New battery
- Hot Air Gun
- Soldering iron
- Solder
- Flux
- Tweezers
- Isopropyl alcohol
- Cotton swabs
Instructions:
| Step | Instructions |
|---|---|
| 1. | Remove the ear tips from your AirPods using a hot air gun. |
| 2. | Use the Phillips head screwdriver to remove the screws on the back of the AirPods. |
| 3. | Carefully pry open the back of the AirPods. |
| 4. | Disconnect the battery from the circuit board. |
| 5. | Solder the new battery to the circuit board. |
| 6. | Reassemble the AirPods. |
| 7. | Put the ear tips back on your AirPods. |
Seeking Professional Help
If replacing the battery of your AirPods did not solve the issue, it may be time to seek professional help or contact Apple customer support.
A certified technician can diagnose and fix any underlying problems that are causing your AirPods to lose their charge quickly.
When seeking professional help, make sure to find a reputable repair shop or Apple Store. You don’t want to risk further damaging your AirPods by going to an inexperienced or unqualified technician.
FAQs
Q1. Why are my AirPods not holding a charge for long?
There could be several reasons why your AirPods are not holding a charge for long. It could be due to aging batteries, software issues, or improper charging habits.
Q2. How can I improve the battery life of my AirPods?
To improve the battery life of your AirPods, you can try reducing the volume, disabling sound enhancements, and disabling automatic ear detection.
Additionally, keeping the firmware updated and following proper charging practices can also help.
Q3. How often should I charge my AirPods?
There is no specific rule, but it is generally recommended to charge your AirPods when the battery level is low or before using them for an extended period.
Avoid overcharging them as it can affect the battery life in the long run.
Q4. Can I use a different charging cable or charger for my AirPods?
It is recommended to use the charging cable and charger that came with your AirPods or a certified Apple accessory.
Using a different cable or charger may affect the charging performance and battery life of your AirPods.
Q5. Why do my AirPods drain the battery even when not in use?
If your AirPods are draining battery even when not in use, it could be due to background app activity, Bluetooth connectivity issues, or a software glitch.
Try closing unused apps and resetting your AirPods to see if it resolves the issue.
Q6. How can I check the battery health of my AirPods?
You can check the battery health of your AirPods on your connected device. Open the Bluetooth settings, locate your AirPods, and view the battery percentage.
If the battery percentage is significantly lower than expected, it may indicate a battery issue.
Q7. Should I store my AirPods in the charging case when not in use?
Yes, it is recommended to store your AirPods in the charging case when not in use. The case helps protect the AirPods and keeps them charged, ensuring they are ready for use when you need them.
Q8. Can software updates improve the battery life of AirPods?
Yes, software updates can include optimizations and improvements that may enhance the battery life of your AirPods.
It is recommended to keep your AirPods and connected devices updated with the latest firmware.
Q9. Why do my AirPods lose battery even when not connected to any device?
AirPods may lose battery over time even when not connected to any device due to natural battery self-discharge.
However, if the battery drain is significant, it could indicate a hardware issue that requires further investigation.
Q10. Can using noise cancellation or transparency mode drain the AirPods’ battery faster?
Yes, enabling noise cancellation or transparency mode on your AirPods can increase power consumption and lead to faster battery drain.
It is advisable to use these features selectively when needed to preserve battery life.
Q11. Is there a warranty for AirPods with battery issues?
AirPods typically come with a limited warranty from Apple. If your AirPods are experiencing battery issues and are still within the warranty period, you may be eligible for repairs or replacement. Contact Apple Support for assistance.
Conclusion
Congratulations! You have successfully learned how to fix your AirPods if they are not holding a charge for long.
Remember, the first step is always checking for software updates to ensure that your AirPods are up-to-date and functioning properly. If that doesn’t work, try resetting your AirPods or cleaning them.
In addition, turning off automatic ear detection and disabling active noise cancellation can also help conserve battery life.
If all else fails, consider using a battery case or charger or replacing the AirPods battery altogether.
With these tips in mind, you can enjoy longer-lasting AirPods and uninterrupted listening experiences.

John Paul is a tech enthusiast dedicated to troubleshooting. He is passionate about fixing glitches, simplifying complexities, and empowering others in the digital realm.