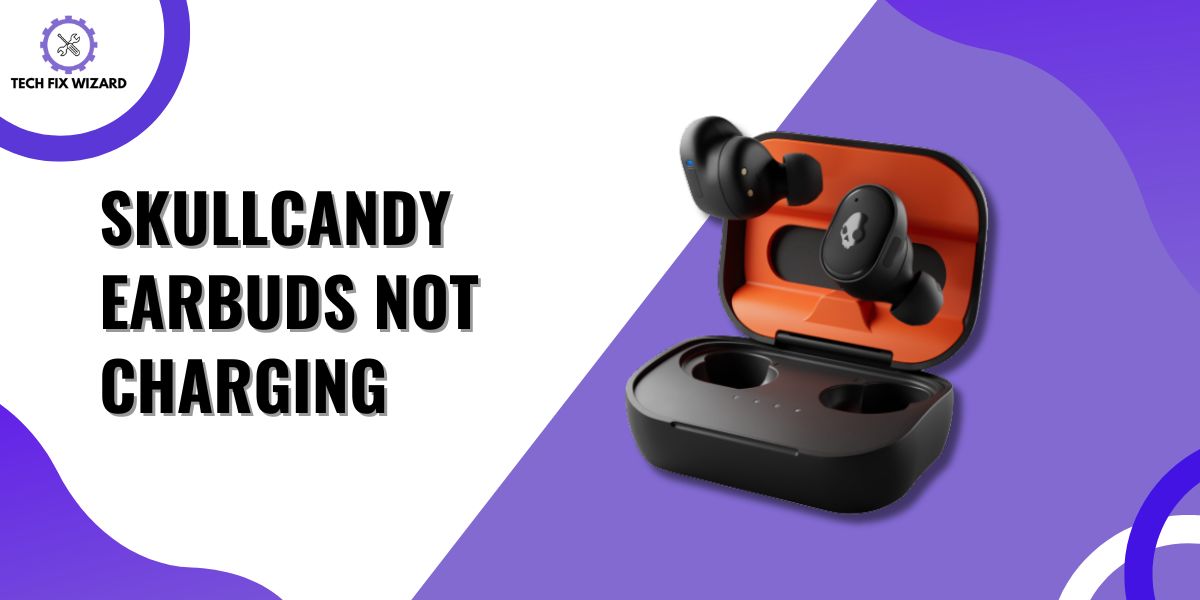
Dealing with Skullcandy earbuds not charging can be quite frustrating.
These portable audio devices are designed for seamless music enjoyment, but when they refuse to charge, it can be a real inconvenience.
Whether you’re a music enthusiast or always on the go, the inability to charge your Skullcandy earbuds can disrupt your routine.
In this guide, we will provide practical solutions to get them charging again.
Contents
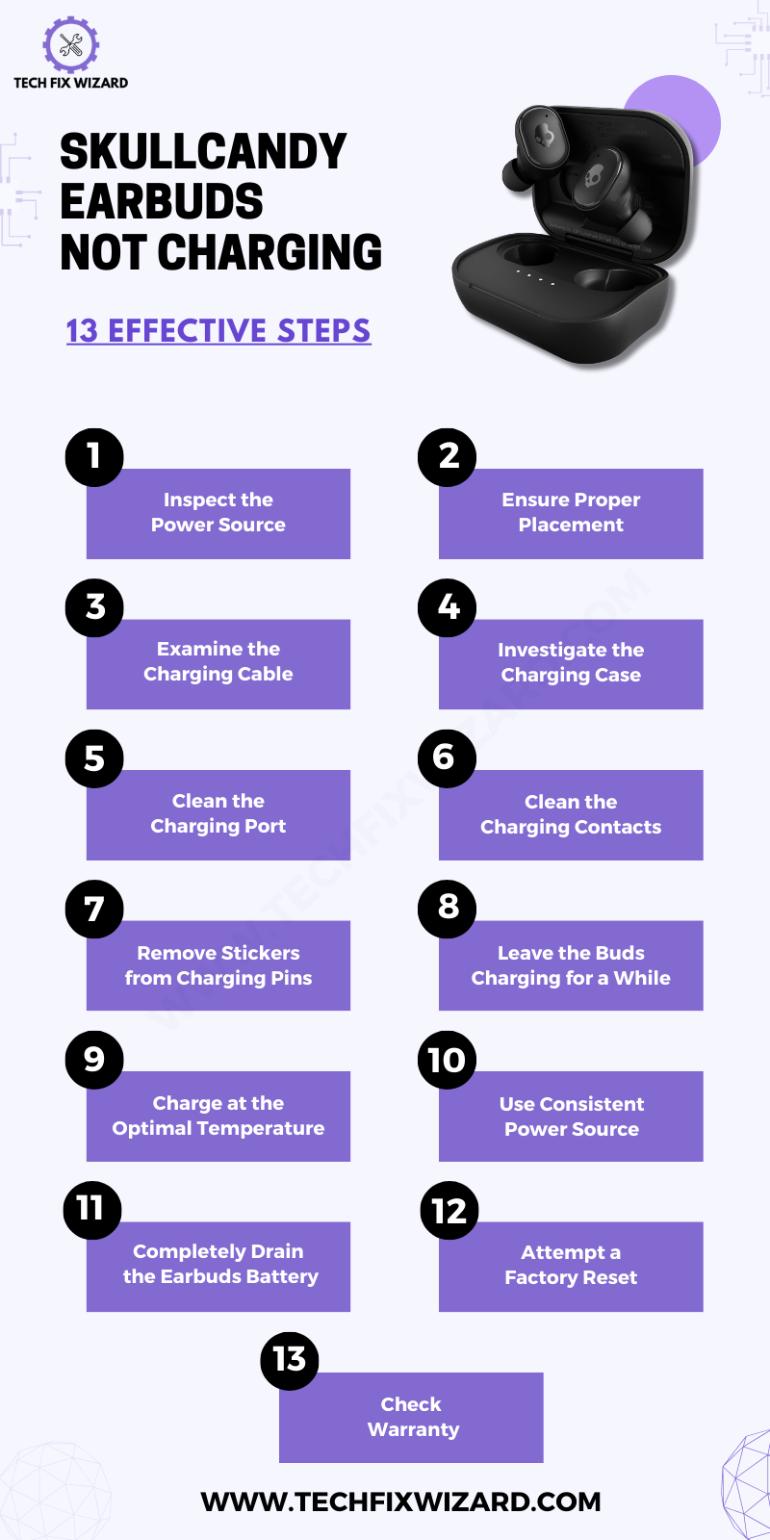
- 1 Fixing Skullcandy Earbuds Not Charging Issue – 13 Steps
- 2 1. Inspect the Power Source
- 3 2. Ensure Proper Earbud Placement
- 4 3. Thoroughly Examine the Charging Cable
- 5 4. Investigate the Charging Case
- 6 5. Clean the Charging Port
- 7 6. Clean the Charging Contacts
- 8 7. Remove Stickers Blocking Charging Pins
- 9 8. Leave the Buds Charging for a While
- 10 9. Charge at the Optimal Temperature
- 11 10. Maintain a Consistent Power Source
- 12 11. Completely Drain the Earbuds Battery
- 13 12. Attempt a Factory Reset
- 14 13. Check Warranty
- 15 FAQs
- 16 1. How do I know if my Skullcandy earbuds case is charging?
- 17 2. How do you know if your Skullcandy earbuds are charging?
- 18 3. How do I know if my Skullcandy Push is charging?
- 19 4. How do you check the battery on Skullcandy earbuds?
- 20 5. What do I do if my Skullcandy headphones won’t charge?
- 21 6. Why are my Skullcandy over-ear headphones not charging?
- 22 7. How do you fix earbuds that are not charging?
- 23 8. How do I make sure my Skullcandy earbuds are charging?
- 24 9. How long do Skullcandy earbuds take to charge?
- 25 10. Why is my Skullcandy earbud blinking red while charging?
- 26 11. Why is my Skullcandy earbud not working?
- 27 12. Why does the red light on my Skullcandy earbuds stay on in the case?
- 28 13. How do I reset my Skullcandy earbuds?
Fixing Skullcandy Earbuds Not Charging Issue – 13 Steps
Follow the troubleshooting steps below to identify and resolve the issue of Skullcandy Earbuds not charging.
1. Inspect the Power Source
To resolve the issue of Skullcandy Earbuds not charging, it’s vital to start with a meticulous examination of your power source.
Begin by thoroughly verifying the power outlet or USB port you’re using for charging. Ensure there are no loose connections or visible damage to either the outlet or adapter.
A snug and secure connection is essential for successful charging.
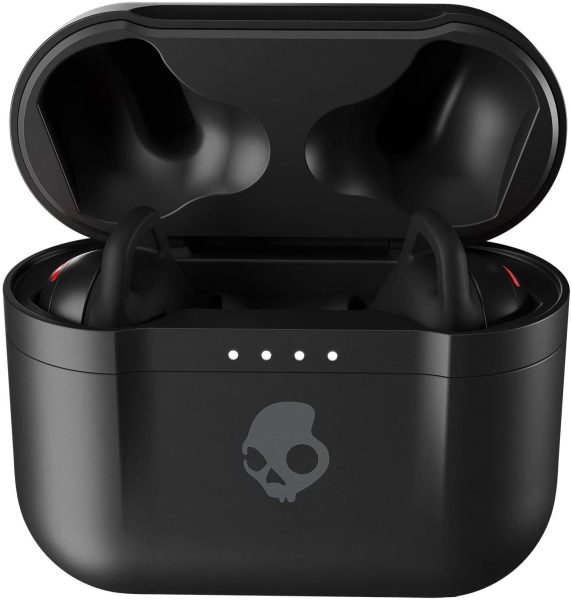
2. Ensure Proper Earbud Placement
The correct placement of your earbuds within the charging case is very important.
It guarantees that they make reliable contact with the charging pins, a fundamental aspect of successful charging.
Before proceeding with further troubleshooting, it’s crucial to ensure that the earbuds are snugly and precisely seated within the case, ensuring a secure connection between the charging pins on both the earbuds and the case.

Also Read: Indy Evo Not Charging – [FIXED] 8 Steps To Try
3. Thoroughly Examine the Charging Cable
Now, you should check if the charging cable you are using is working properly. Sometimes, the issue lies with the cable itself and not with the case or earbuds.
Begin by inspecting the cable for any visible damage such as frayed wires or bent connectors. Next, try using a different charging cable to see if it makes a difference.
If the new cable charges your Skullcandy earbuds without any problems, then you know that the original cable was faulty.
However, if the new cable doesn’t work either, then there may be an issue with either the case or the earbuds themselves.
In that case, move on to troubleshooting those components further to determine what might be causing the problem.
4. Investigate the Charging Case
Your charging case plays a pivotal role in the charging process. So, confirm that the case itself is adequately charged. It must possess enough power to facilitate the charging of your earbuds.
A well-charged case is essential for the successful replenishment of your earbuds’ batteries.
Following this, proceed to clean the charging ports and contacts both on your earbuds and within the case. Dust or debris accumulation can frequently impede the charging process, resulting in issues.
Consider Reading: Sesh Evo Case Not Charging – 7 Easy Solutions To Try
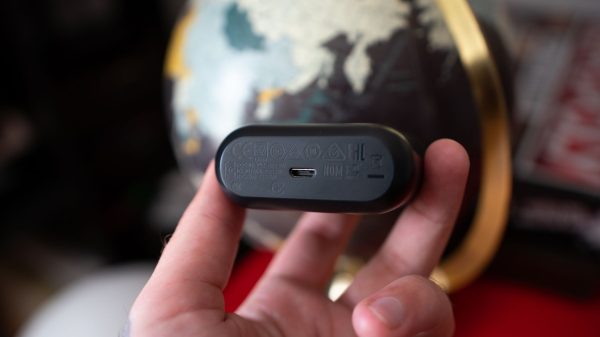
5. Clean the Charging Port
Next, take a look at the charging port. It’s possible that if we don’t take care of our earbuds and neglect to clean them, dust and debris will accumulate in the charging port.
To clean the charging port, start by cautiously inserting a small tool or paperclip into the port to remove any visible debris. Avoid using excessive force or sharp objects that could harm the port.
Once you’ve cleared any visible debris, shine a light inside the port to check for corrosion or bent pins that might be causing connection issues.
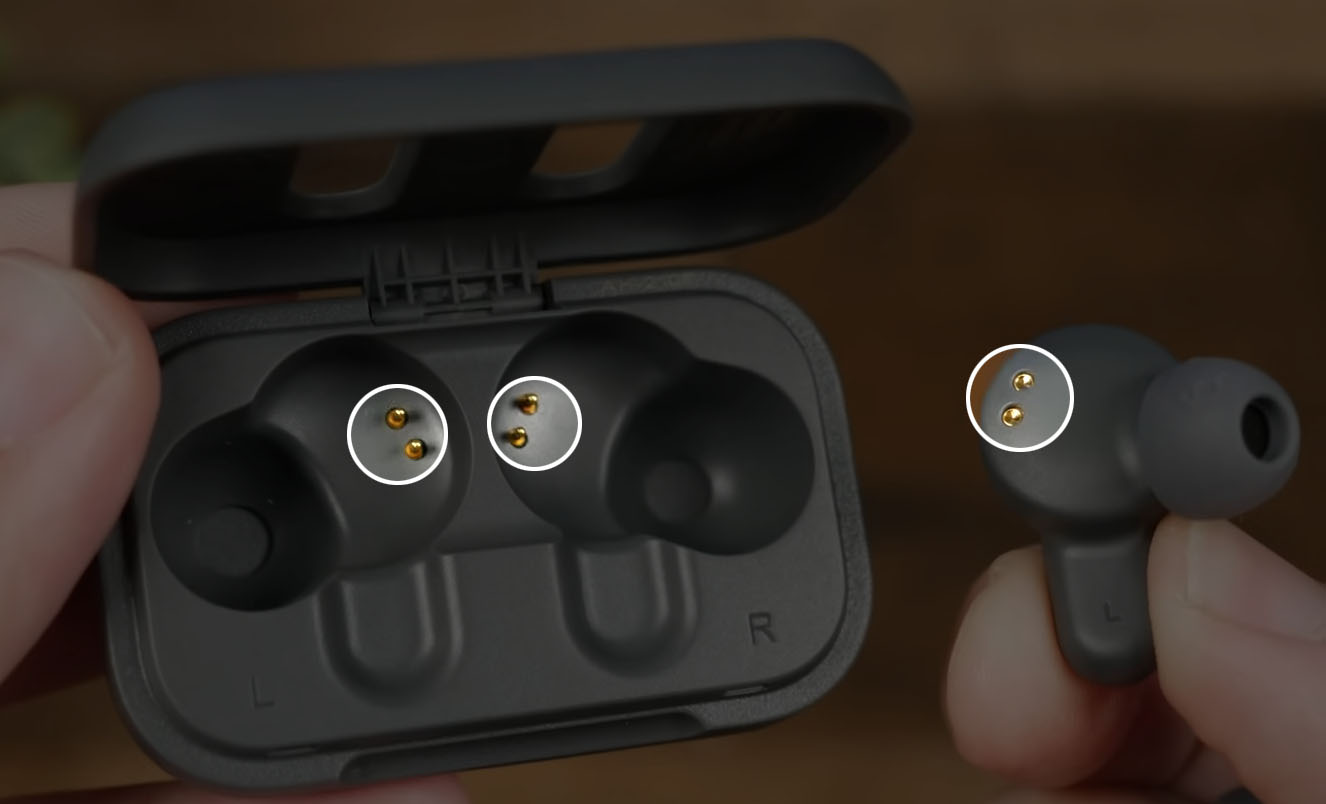
6. Clean the Charging Contacts
Sometimes, dust and debris can gather on the contacts, disrupting the connection between the earbuds and the charging case.
- Inspect both the pins on the earbuds and inside the case for dirt or grime.
- If there’s any buildup, gently wipe it away using a soft cloth or cotton swab.
- Be careful not to exert too much pressure to avoid damaging the contacts.
- After cleaning, carefully reinsert the earbuds into the case.
- Observe if the earbuds start charging as expected.
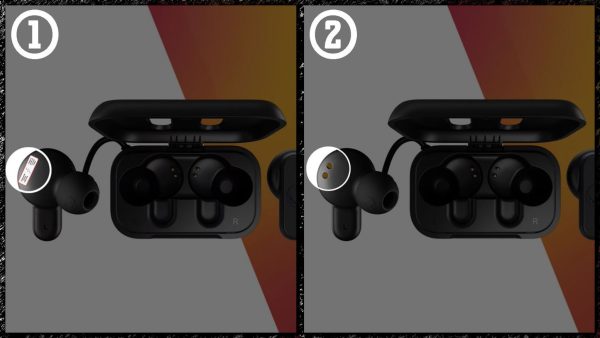
7. Remove Stickers Blocking Charging Pins
When you’ve just purchased a brand-new pair of Skullcandy earbuds, it’s quite common to discover small stickers obstructing the charging pins.
It’s absolutely critical to remove these stickers before attempting to charge your newly acquired earbuds. Neglecting this step will result in the pins not making proper contact, rendering your attempts to charge them ineffective.
Ensuring the prompt removal of these obstructive stickers is a straightforward yet absolutely essential measure to troubleshoot any charging issues with your fresh purchase.
8. Leave the Buds Charging for a While
Sometimes, patience is the key to resolving charging problems. If your earbuds and the charging case have been completely depleted of power, it’s a good practice to leave them charging for an extended period.
This extended charging time allows the earbuds to recover from their completely depleted state. Often, this patience can prove effective in resolving charging issues and bringing your earbuds back to life.
9. Charge at the Optimal Temperature
The charging environment can significantly impact battery performance. It’s imperative to ensure that your earbuds are charged within the recommended temperature range.
Extreme cold or heat can adversely affect the battery, causing charging problems. Charging your earbuds within the optimal temperature range provides the ideal conditions for efficient charging and helps alleviate potential charging issues.
You Might Find Helpful:
- Bose QuietComfort Earbuds Not Charging – 9 Solutions To Consider
- JLab Go Air Not Charging – Try These 6 Easy Solutions
10. Maintain a Consistent Power Source
In certain scenarios, your charging case may only charge the earbuds when it’s connected to a power source.
To investigate if this can resolve any charging issues with your earbuds, consider the following step: consistently keep the charging case plugged in.
This practice ensures that the case maintains a continuous and adequate power level, which is essential for effective earbud charging.
By adopting this approach, you may have the opportunity to address and potentially resolve any charging problems that may arise due to a malfunctioning case.
11. Completely Drain the Earbuds Battery
In some cases, deliberately draining the battery completely can help reset the charging mechanism of your earbuds and potentially resolve charging issues.
To do this, you can remove the earbuds from the case and allow them to remain outside the case in a non-charging state but in pairing mode until they completely discharge.
This process can help eliminate any glitches in the battery management system. After ensuring they are entirely depleted, return them to the case and charge them again to full capacity.
This procedure can serve as a useful troubleshooting step when facing persistent charging problems.
Another effective step is intentionally draining the battery. This method has proven effective for numerous users and can help reset and recalibrate the earbuds’ internal systems.
While this step can be highly effective, it’s vital to recognize the potential downsides. When the earbuds are powered off, they become susceptible to damage from dust, dirt, and moisture.
It’s advisable to store them in a clean and dry environment during this period to prevent any unwanted damage.
12. Attempt a Factory Reset
If the previous steps fail to resolve the issue, consider performing a factory reset on your earbuds.
This step can be especially helpful in addressing software-related issues that might be hindering the charging process.
Refer to the user manual for your specific Skullcandy earbud model to find the manufacturer’s instructions on how to perform a factory reset.
It’s essential to follow these reset steps carefully to ensure they work effectively.
Here are the reset steps for two models of Skullcandy earbuds: Sesh Evo and Indy Evo to help you understand the process better:
Resetting Skullcandy Sesh Evo Earbuds and Case
To reset Skullcandy Sesh Evo:
- Press the power button and remove the earbuds from the case.
- Hold down the top of both earbuds for 6 seconds and wait.
- Then, press and hold the top of the earbuds for 10 seconds.
- Place the earbuds back in the case and close it.
- Your earbuds are now ready to be synced with your phone.
- Access your phone’s Bluetooth settings and search for the “Sesh Evo” option.
- Select the “Sesh Evo” option to establish the connection between your phone and the earbuds.
Steps to reset the Indy Evo earbuds
Follow the steps provided below to reset:
| # | Steps |
|---|---|
| 1. | Open your smartphone’s Bluetooth settings and disconnect (unpair) the Skullcandy earbuds from your device. |
| 2. | Once disconnected, forget the device to ensure complete unpairing. |
| 3. | Take the Skullcandy earbuds out of their charging case. |
| 4. | Press and hold both earbuds simultaneously for approximately 6 seconds to manually power them off. |
| 5. | Release your hold on the earbuds and allow about 5 seconds to pass. |
| 6. | Press and hold both earbuds again, this time for 10 seconds, to perform a complete reset. |
| 7. | Place the earbuds back into their charging case. |
| 8. | Remove the earbuds from the case once more. You should see both LED lights turn red. |
| 9. | Proceed to pair the earbuds with your smartphone or desired device. |
13. Check Warranty
In the event that none of the previous troubleshooting steps yield positive results and your earbuds are still under warranty, it’s advisable to check the warranty status.
If your earbuds are within the warranty period, you can reach out to the manufacturer for further assistance or even a replacement if necessary.
Trending Blog Posts:
- JLab Not Charging – 7 Quick Fixes To Resolve
- Sony WF-1000XM4 Not Charging – 14 Steps To Get It Fixed
FAQs
1. How do I know if my Skullcandy earbuds case is charging?
Check for LED indicators on the earbud case. Many Skullcandy cases have lights that change color or blink while charging. If you see these indicators, it means the case is charging. Also, make sure the case is connected to a power source.
2. How do you know if your Skullcandy earbuds are charging?
To determine if your Skullcandy earbuds are charging, place them in the charging case and look for LED lights on both the earbuds and the case. The lights typically change color or blink to indicate charging. Additionally, ensure the case itself is connected to a power source.
3. How do I know if my Skullcandy Push is charging?
To check if your Skullcandy Push earbuds are charging, place them in the charging case and look for LED indicators. The earbuds should have lights that change color or blink when they are charging. Make sure the case is also connected to a power source for the charging process to occur.
4. How do you check the battery on Skullcandy earbuds?
You can check the battery status of your Skullcandy earbuds by examining the LED indicators on the earbuds themselves or the charging case.
Refer to the user manual for specific color codes or blinking patterns that indicate the battery level.
Additionally, some Skullcandy earbuds may have companion apps that display battery information on your smartphone.
5. What do I do if my Skullcandy headphones won’t charge?
If your Skullcandy headphones won’t charge, try using a different charging cable and power source. Make sure the charging port is clean and free of debris. If the issue persists, contact Skullcandy support.
6. Why are my Skullcandy over-ear headphones not charging?
Over-ear headphones often have larger batteries. Ensure the charging cable is properly connected, and the headphones are turned off while charging. If they still don’t charge, check for cable or port damage.
7. How do you fix earbuds that are not charging?
First, clean the charging contacts on the earbuds and the case. Ensure the case and earbuds are fully charged. Try using a different charging cable and power source. If none of these work, contact Skullcandy support.
8. How do I make sure my Skullcandy earbuds are charging?
Place the earbuds in the charging case and check for LED indicators. They should light up or change colors to show they are charging. Also, ensure the case itself is charged.
9. How long do Skullcandy earbuds take to charge?
The charging time varies by model, but it typically takes 1 to 2 hours for Skullcandy earbuds to fully charge.
10. Why is my Skullcandy earbud blinking red while charging?
A red blinking light during charging could indicate a low battery or an issue with the charging process. Check the connection and try a different cable or charging source.
11. Why is my Skullcandy earbud not working?
If your Skullcandy earbud isn’t working, ensure it’s charged, clean, and properly paired with your device. If it still doesn’t work, try resetting it or contact support.
12. Why does the red light on my Skullcandy earbuds stay on in the case?
A steady red light often indicates that the earbuds are still charging or haven’t fully charged yet. Leave them in the case until the light changes color or turns off.
13. How do I reset my Skullcandy earbuds?
To reset Skullcandy earbuds, usually, you usually need to follow specific button sequences mentioned in the user manual. Typically, this involves holding down certain buttons for a set period of time until you see a reset indication.

John Paul is a tech enthusiast dedicated to troubleshooting. He is passionate about fixing glitches, simplifying complexities, and empowering others in the digital realm.