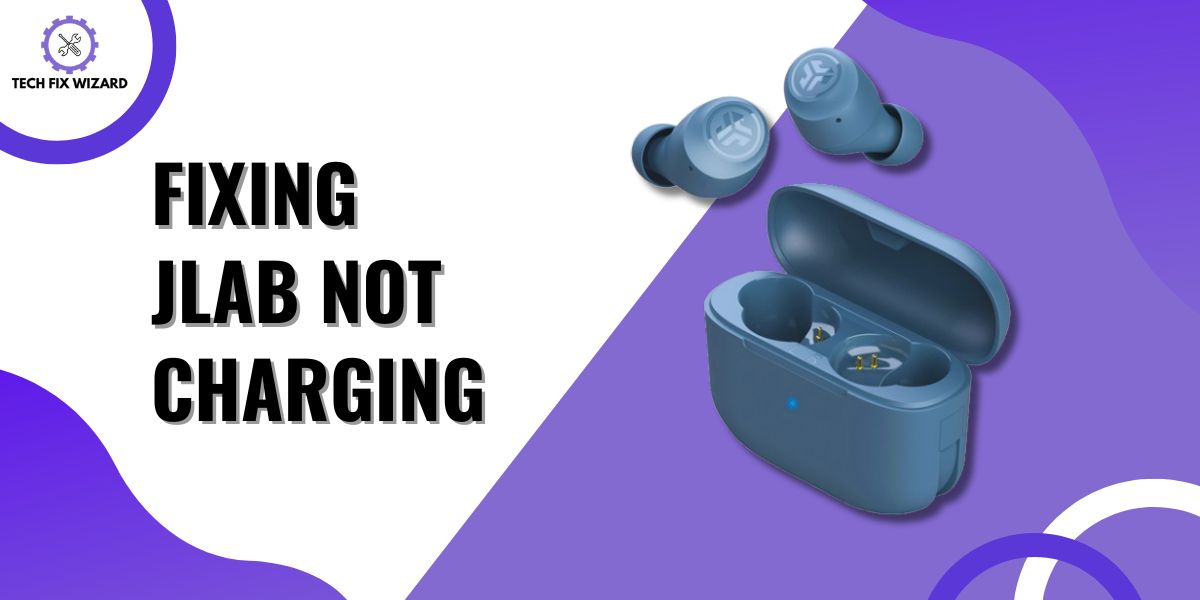
We’ve all been there – relying on our trusty JLab devices to keep us entertained with fantastic audio, only to face the frustrating issue of “JLab Not Charging.”
It’s like your device decided to take a break right when you needed it the most. But don’t worry, we’re here to help you resolve this issue.
In this article, we’ll discuss various reasons why your JLab earbuds are not charging and provide you with solutions to fix them.
Contents
- 1 4 Common Causes of JLab Not Charging
- 2 7 Troubleshooting Steps for JLab Not Charging
- 3 1. Proper Placement in the Case
- 4 2. Check Charging Cable
- 5 3. Verify Power Source
- 6 4. Inspect and Clean Charging Pins
- 7 5. Consider Temperature Factor
- 8 6. Reset the Earbuds
- 9 7. Update Firmware
- 10 FAQs
- 11 1. Can I Charge My Jlab Device Using a Different Charging Cable?
- 12 2. Is It Safe to Use a Fast Charger With My Jlab Device?
- 13 3. Why Is My Jlab Device Charging Very Slowly?
- 14 4. Is There a Way to Prevent My Jlab Device From Overcharging?
- 15 5. What to Do If JLab Headphones Won’t Charge?
- 16 6. How to Get My JLab Earbuds to Charge?
- 17 7. How to Know If JLab Is Charging?
- 18 8. Why Are My Earbuds Not Charging?
4 Common Causes of JLab Not Charging
Before diving into troubleshooting, it’s essential to understand the common reasons behind the issue. By identifying the root causes, you can target the problem more effectively and choose the right solution for your specific situation.
| Common Causes | Description |
|---|---|
| 1. Damaged Charging Cable | A frayed or damaged charging cable can hinder proper connection and charging. |
| 2. Power Source Issue | An ineffective power source, like a faulty USB port or adapter, can prevent adequate charging. |
| 3. Software Glitches | Software issues or glitches might disrupt the charging process. |
| 4. Environmental Factors | Extremely high or low temperatures can impact charging efficiency. |
7 Troubleshooting Steps for JLab Not Charging
Now, let’s delve into troubleshooting the issue following the systematic steps provided below:
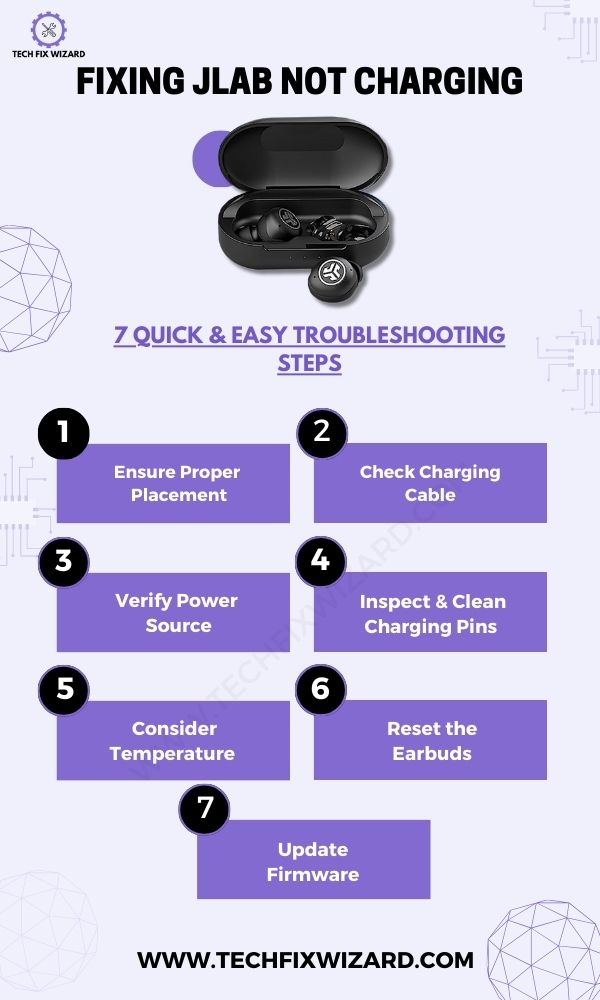
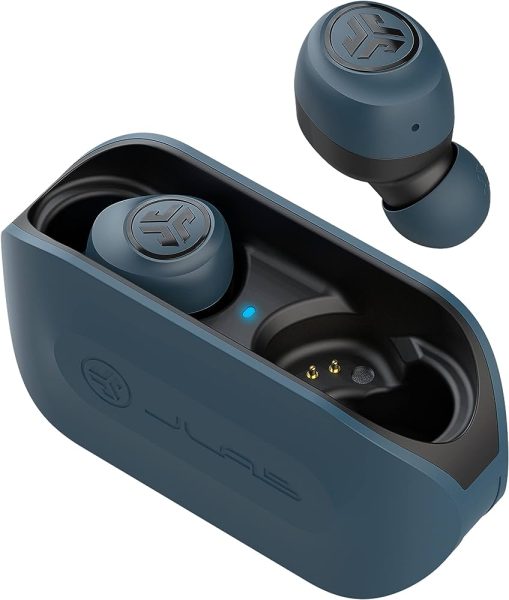
1. Proper Placement in the Case
Before trying anything else, the very first thing to do is put each earbud in its slot inside the charging case correctly.
This is super important because it’s where charging begins. Also, keep in mind that if the earbuds or their pins are damaged, it can mess up the alignment.
So, when you place the earbuds in the case, make sure the metal charging parts on the earbuds touch the metal pins in the case. This helps them connect properly and start charging.
Quick Read: JLab Headphones Not Charging – 8 Steps To Resolve The Issue
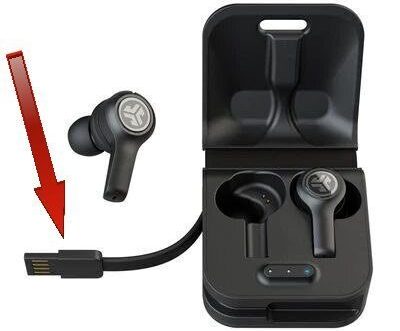
2. Check Charging Cable
Now, it’s time to take a look at the charging cable. If your JLab model supports a separate charging cable, give it a good inspection.
Check for any hints of damage, like wires poking out or the cable looking worn out. If you spot any of these issues, it might be causing problems with charging.
To fix this, think about getting a new cable that’s in good shape. This way, you ensure the connection for charging works as it should.
Alternatively, if your earbuds have a non-detachable built-in charging cable, it’s important to make sure it’s doing well. Make certain that it’s not damaged or frayed.
If you find that it’s not working properly, you will have to replace the whole case to fix the charging issue.
3. Verify Power Source
If the charging cable is not causing the issue, then let’s check the power source you’re using. This could be a USB port or a power adapter.
It’s important to make sure it’s working right. Try connecting the charging cable to a different power source if you can. This helps figure out if the problem is with the original power supply or not.
Sometimes, a faulty power source can mess up the charging process. This step helps make sure that the juice is flowing smoothly to your earbuds.
Read Blog Post: JLab Epic Air ANC Not Charging – 6 Steps You Should Try
4. Inspect and Clean Charging Pins
After ruling out other external factors, such as the charging cable and power source, as potential causes, take some time to thoroughly inspect the charging pins as well.
Take a closer look at the charging pins. These little parts are what make the charging happen.
First, take a careful look at the charging pins on both the earbuds and the charging case. Look out for any dirt, stuff like debris, or even rust that might have accumulated.
If you see any of these things, don’t worry – it’s fixable. Take a soft, dry cloth or a cotton swab, and gently clean those pins.
The idea is to make sure they’re nice and clean so that the power can flow smoothly from the case to the earbuds.
5. Consider Temperature Factor
It’s important to factor in temperature when dealing with charging performance. Keep in mind that extreme temperatures, whether they’re very high temperature or very low, can have a notable impact on how effectively your earbuds charge.
If you find yourself in an environment where the temperature is quite extreme, it’s a good idea to make some adjustments. Opt for a more moderate temperature setting to charge your earbuds.
This can significantly improve the charging process and potentially prevent any issues arising from the challenging temperature conditions.
You Might Find Helpful:
- Bose QuietComfort Earbuds Not Charging – 9 Solutions To Consider
- JLab Go Air Not Charging – Try These 6 Easy Solutions
6. Reset the Earbuds
At times, performing a reset can prove beneficial in resolving charging problems. A reset essentially brings the earbuds back to their original settings, potentially resolving any software glitches that could be at the root of the issue.
Follow these steps to reset your earbuds:
- Take the earbuds out of the charging case.
- Press the multifunction buttons on BOTH earbuds seven times.
- You’ll observe the earbuds flashing blue four times.
- Now, remove both earbuds from the charging case.
- One of the earbuds will emit a solid white light, while the other will alternate between blinking blue and white. This indicates that it’s ready to pair with your device.
However, it’s important to remember that the steps for performing a reset may vary from one model to another.
To get accurate and model-specific reset instructions, it’s advisable to check the official website or refer to the user manual provided with your JLab earbuds.
7. Update Firmware
Keeping the firmware up to date can sometimes improve overall performance, including charging functionality.
Use the dedicated app (if available) to check for firmware updates for your earbuds.
Follow the steps below to update the firmware:
- Begin by downloading the JLab Sound App from either the Google Play Store or the Apple Store.
- Launch the JLab Sound App and establish a connection between your JLab earbuds and your smartphone.
- Locate and tap on the “Settings” icon, positioned in the upper right corner of the app’s screen.
- Within the settings menu, find and select “Firmware Update.”
- If an available firmware update exists, the app will notify you and guide you to proceed with the update.
- To initiate the update process, tap on the “Install” button.
- The update will then be applied to your JLab earbuds.
- Once the update concludes, your earbuds will automatically restart.
Also Read:
FAQs
1. Can I Charge My Jlab Device Using a Different Charging Cable?
Yes, you can try charging your JLab device using a different charging cable. Sometimes the original cable may be faulty or incompatible. Give it a shot and see if it solves the issue.
2. Is It Safe to Use a Fast Charger With My Jlab Device?
It’s important to consider the safety of using a fast charger with your JLab device. While it may charge faster, it could potentially damage the battery or other internal components.
Proceed with caution and check the manufacturer’s recommendations.
3. Why Is My Jlab Device Charging Very Slowly?
Your JLab device may charge slowly due to a few reasons. First, check if the charging cable is damaged or not compatible. Also, try using a different power source or resetting the device.
4. Is There a Way to Prevent My Jlab Device From Overcharging?
To prevent your JLab device from overcharging, make sure to unplug it once it’s fully charged. Leaving it plugged in for extended periods can damage the battery and reduce its lifespan.
5. What to Do If JLab Headphones Won’t Charge?
Check cable for damage, try different power sources, reset firmware, ensure moderate temperature for charging, consult manual, or contact support if the issue persists.
6. How to Get My JLab Earbuds to Charge?
Inspect cable, connect to a working power source, update app if applicable, ensure proper placement in case, monitor LED indicators, troubleshoot with different cable or source if not charging.
7. How to Know If JLab Is Charging?
Observe LED changes or flashing, watch for battery icon or animation on the device screen, check the app if available, and allow a few moments for a response after connecting to power.
8. Why Are My Earbuds Not Charging?
Potential cable damage, faulty power sources, software glitches, and extreme temperatures can cause non-charging issues.
Check cable and power source, try reset or firmware update, ensure correct placement, verify LED indicators, and seek further assistance if needed.

John Paul is a tech enthusiast dedicated to troubleshooting. He is passionate about fixing glitches, simplifying complexities, and empowering others in the digital realm.