Experiencing problems with your JLab Go Air earbuds not charging can be both frustrating and inconvenient.
When faced with this issue, you might find yourself disconnected from your music and calls just when you need them the most.
In this guide, we will explore the possible causes behind the “JLab Go Air not charging” problem and provide you with a range of troubleshooting steps to help you resolve the issue and enjoy uninterrupted audio once again.
Let’s get started on troubleshooting together.
Contents
- 1 How to Charge JLab Go Air Earbuds
- 2 8 Possible Reasons behind JLab Go Air Not Charging Issue
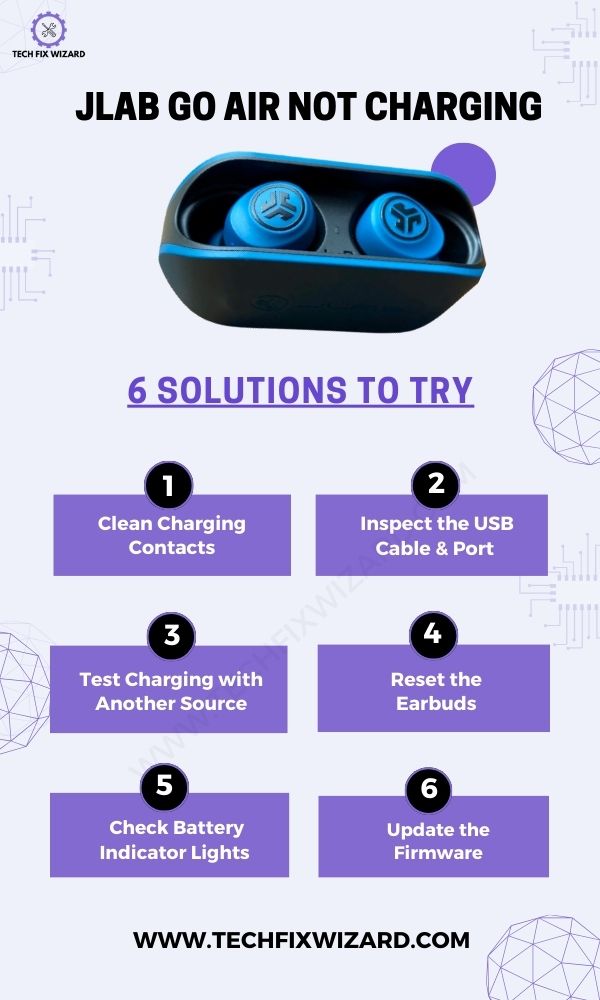
- 3 Resolving JLab Go Air Not Charging in 6 Steps
- 4 1. Clean Charging Contacts
- 5 2. Inspect the USB Cable
- 6 3. Test Charging with Another Source
- 7 4. Reset the Earbuds
- 8 5. Check Battery Indicator Lights
- 9 6. Update the Firmware
- 10 FAQs
- 11 1. Why Are My JLab GO Air Earbuds Not Charging Properly?
- 12 2. How Can I Clean the Charging Contacts of My Earbuds and Charging Case?
- 13 3. My Earbuds Won’t Charge Despite Using a Different USB Port. What Could Be Wrong?
- 14 4. What Should I Do if the Battery Indicator Lights on the Charging Case Don’t Work as Expected?
- 15 5. Can a Firmware Update Solve My Earbuds’ Charging Problems?
- 16 6. Can Physical Damage Affect the Charging Performance of My Earbuds?
- 17 7. How Can I Determine if My Earbuds’ Charging Case Is Defective?
- 18 8. Are There Compatibility Issues Between My Earbuds and Charging Source?
- 19 9. What Should I Do if My Earbuds Charge Slowly or Intermittently?
- 20 10. Can Normal Wear and Tear Affect My Earbuds’ Charging Capabilities Over Time?
How to Charge JLab Go Air Earbuds
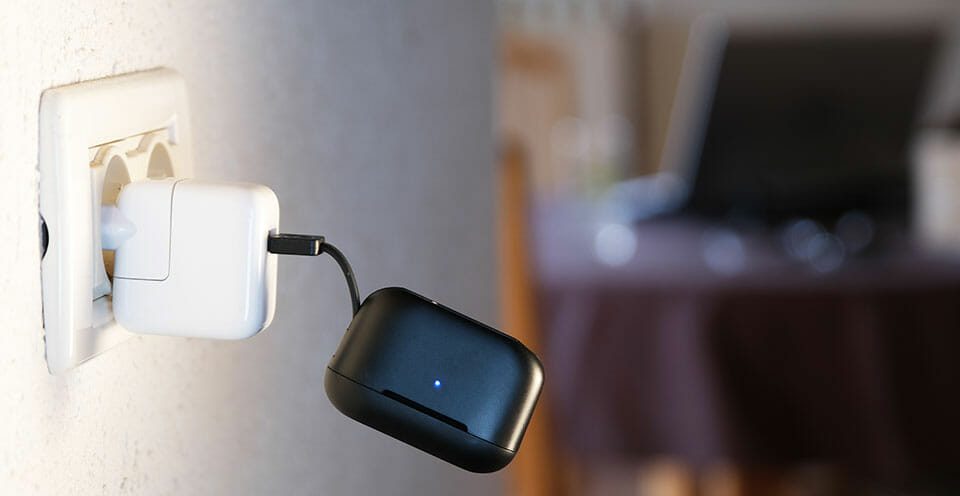
The JLab Go Air earbuds don’t require a Lightning cable; instead, they have a USB cable integrated into the charging case. This cable is neatly tucked into a small recess at the bottom of the case.
To charge the earbuds, you simply need to plug the cable into a USB port. The earbuds will then start charging automatically.
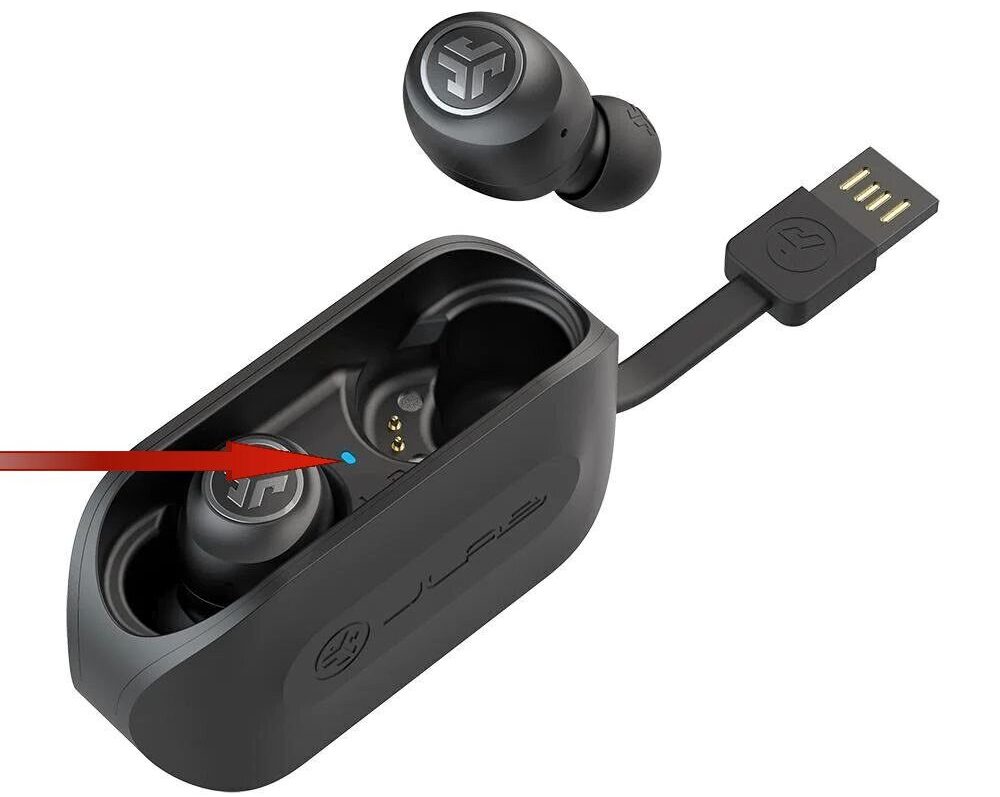
The JLab Go Air earbuds feature a built-in battery indicator. For a comprehensive understanding of how this indicator functions to convey the battery level, please refer to the user manual.
Regarding the charging process, the indicator lights will flash blue during the earbuds’ charging phase and will automatically turn off upon reaching a full charge.
8 Possible Reasons behind JLab Go Air Not Charging Issue
There are various factors that might contribute to the charging problem, potentially stemming from both the earbuds themselves and the USB port.
Understanding these potential reasons can serve as a comprehensive troubleshooting approach, ensuring that every aspect is considered in the pursuit of a solution.
| No. | Possible Reasons | Description |
|---|---|---|
| 1 | Dirty or Damaged Charging Contacts | Accumulation of dust, debris, or dirt on the charging contacts can hinder proper electrical contact for charging. |
| 2 | Defective USB Cable or Port | A damaged integrated USB cable or faulty USB port can lead to a weak or inconsistent connection, affecting charging. |
| 3 | Charging Case Defect | Malfunctions in the charging case’s circuitry or internal components can prevent effective power delivery to earbuds. |
| 4 | Earbuds’ Charging Circuitry Issue | Malfunctions in the earbuds’ charging circuitry may hinder proper communication with the charging case for charging. |
| 5 | Firmware or Software Issue | Bugs or glitches in the earbuds’ firmware or software can disrupt the charging process by hindering device recognition. |
| 6 | Physical Damage | Impacts, water exposure, or physical damage can interfere with the proper functioning of the charging mechanism. |
| 7 | Battery Indicator Lights Malfunction | Malfunctioning battery indicator lights can cause confusion about the earbuds’ charging status. |
| 8 | Wear and Tear | Gradual wear and tear on internal components over time can lead to degraded performance and charging issues. |
Resolving JLab Go Air Not Charging in 6 Steps
Now, let’s explore a straightforward approach to address the problem. Just follow the six simple steps below to resolve the issue and make sure your JLab GO Air earbuds stay powered up.
1. Clean Charging Contacts
The initial and essential step in troubleshooting charging issues with your JLab GO Air earbuds involves ensuring the cleanliness of the charging contacts on both the earbuds and the charging case.
These charging contacts are small metal points that facilitate the transfer of power from the case to the earbuds during the charging process.
Over time, due to regular usage or exposure to various environments, these contacts can gather dust, debris, or dirt, which can create a barrier between the metal points and hinder the effective flow of electricity.
- To address this issue, start by gently and meticulously cleaning the charging contacts.
- You can use a soft, dry cloth or a cotton swab to clean the contacts effectively.
- Gently wipe the contacts on both the earbuds and the corresponding slots in the charging case.
- While doing so, be cautious not to apply excessive pressure, as the contacts are delicate and can be easily damaged.
- The main goal is to remove any accumulated particles that might be disrupting the electrical connection between the earbuds and the charging case.
By cleaning the charging contacts, you aim to ensure that there’s an unobstructed path for the power to flow between the case and the earbuds.
This step might seem simple, but it’s often the culprit behind charging issues, as even a tiny obstruction can lead to interrupted charging or slow charging speeds.
Read Blog Posts:
- JLab Epic Air ANC Not Charging – 6 Steps You Should Try
- JLab Not Charging – 7 Quick Fixes To Resolve
2. Inspect the USB Cable
Next examine the cable for any visible signs of damage, such as frayed wires or bent connectors. Any wear and tear on the cable could interfere with the proper flow of electricity.
Once you’ve ensured the cable’s integrity, make sure it’s firmly connected to a functional USB port. This port could be on your computer, a wall charger, or a power bank.
A loose or faulty connection can hinder the charging process. To rule out a potential port issue, consider trying a different port.
3. Test Charging with Another Source
You can also consider conducting a charging test by using an alternative USB port, charger, or power source.
This step is pivotal in diagnosing whether the charging issue originates from the earbuds or the specific charging source you are currently utilizing.
Trying different charging sources provides valuable insights into the underlying cause of the problem.
4. Reset the Earbuds
Sometimes, performing a reset can help resolve charging issues. Resetting the earbuds can help restore their internal settings to their default state, potentially addressing any underlying software glitches that might be causing the problem.
- Remove the earbuds from the charging case.
- Tap the multifunction Touch Sensors on BOTH earbuds 7 times.
- The earbuds will blink blue 4 times.
- Take both earbuds out of the charging case.
- One earbud will be solid white and the other will blink blue/white indicating ready to pair to your device.
5. Check Battery Indicator Lights
It’s essential to pay close attention to the battery indicator lights located on the charging case when you connect the earbuds for charging.
These indicator lights serve as visual cues for the charging process and can provide valuable information about the charging case’s functionality.
When you plug in the earbuds, observe the behavior of these lights carefully.
Normal Behavior:
Under normal circumstances, you should expect to see the battery indicator lights flash in a reassuring blue color.
This indicates that the charging process has been initiated, and the earbuds are receiving power from the connected USB source.
Unexpected Behavior:
However, if the lights do not flash blue or behave unexpectedly, it could indicate a problem with the charging case itself.
In such cases, contact JLab customer support or consider replacing the case.
Quick Read: JLab Headphones Not Charging – 8 Steps To Resolve The Issue
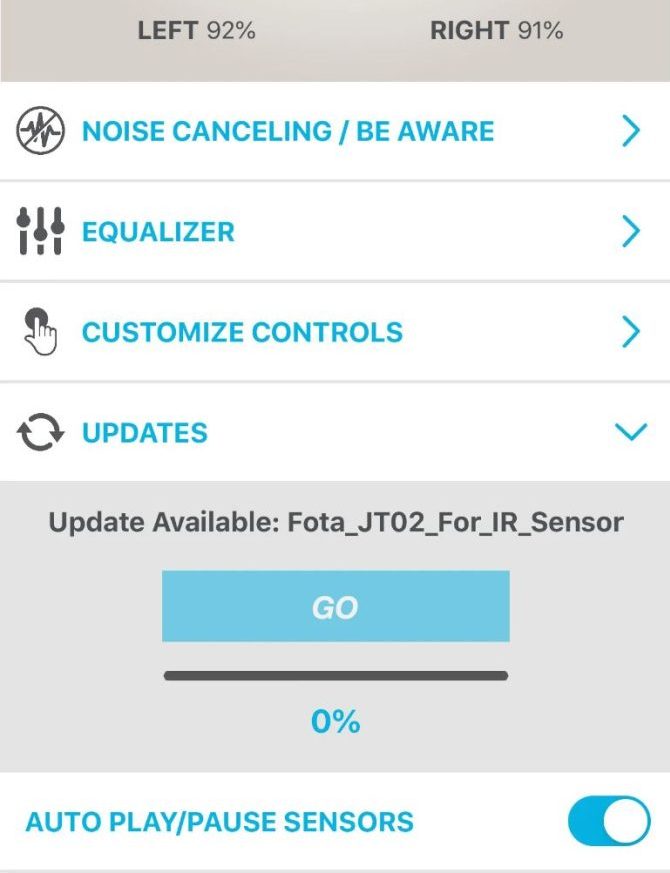
6. Update the Firmware
Consider checking for available software updates to determine if outdated firmware is causing the charging problem.
To check and update the firmware on your JLab Go Air earbuds using the JLab Sound App, follow the steps outlined below
- Download the JLab Sound App from the Google Play Store or the App Store.
- Open the JLab Sound App and connect your JLab Go Air to your smartphone.
- Tap on the “Settings” icon in the top right corner of the screen.
- Tap on “Updates.”
- If there is a firmware update available, the app will prompt you to install it.
- Tap on the “Install” button.
- The update will be installed on your JLab Go Air. Once the update is complete, your JLab Go Air will restart.
Read Blog Posts:
- Haylou GT1 Pro Not Charging – 11 Easy Steps To Restore Charging
- EarFun Earbuds Not Charging – 9 Troubleshooting Steps To Fix
- Yobola T2 Pro Not Charging – Try These 9 Easy Solutions [FIXED]
FAQs
1. Why Are My JLab GO Air Earbuds Not Charging Properly?
Several factors could be at play, such as dirty charging contacts, a defective USB cable or port, charging case issues, or wear and tear on components.
2. How Can I Clean the Charging Contacts of My Earbuds and Charging Case?
Gently wipe the charging contacts with a soft, dry cloth or a cotton swab to remove dust and debris that might hinder proper charging.
3. My Earbuds Won’t Charge Despite Using a Different USB Port. What Could Be Wrong?
If you’ve ruled out the port issue, there might be a problem with the integrated USB cable, the charging case, or the earbuds’ charging circuitry.
4. What Should I Do if the Battery Indicator Lights on the Charging Case Don’t Work as Expected?
Malfunctioning indicator lights can lead to confusion. Check for user manual guidance, and if the issue persists, consider reaching out to customer support.
5. Can a Firmware Update Solve My Earbuds’ Charging Problems?
It’s possible, as firmware updates can address software-related issues. Check the manufacturer’s website for available updates.
6. Can Physical Damage Affect the Charging Performance of My Earbuds?
Yes, physical damage such as impacts or water exposure can disrupt the proper functioning of the charging mechanism.
7. How Can I Determine if My Earbuds’ Charging Case Is Defective?
If you’ve ruled out other factors and your earbuds still don’t charge, a malfunction in the charging case’s circuitry could be a possibility.
8. Are There Compatibility Issues Between My Earbuds and Charging Source?
Using the recommended charging accessories is crucial to avoid compatibility issues that might hinder proper charging.
9. What Should I Do if My Earbuds Charge Slowly or Intermittently?
This might result from a poor connection, worn-out components, or software issues. Refer to troubleshooting steps or contact support.
10. Can Normal Wear and Tear Affect My Earbuds’ Charging Capabilities Over Time?
Yes, as components age, wear and tear can lead to degraded performance, including charging problems.

John Paul is a tech enthusiast dedicated to troubleshooting. He is passionate about fixing glitches, simplifying complexities, and empowering others in the digital realm.