When your Haylou GT1 Pro earbuds suddenly refuse to charge, it can undoubtedly disrupt your audio experience and lead to frustration.
However, this article aims to help you troubleshoot and resolve the issue of your Haylou GT1 Pro not charging.
So, let’s get started!
Contents
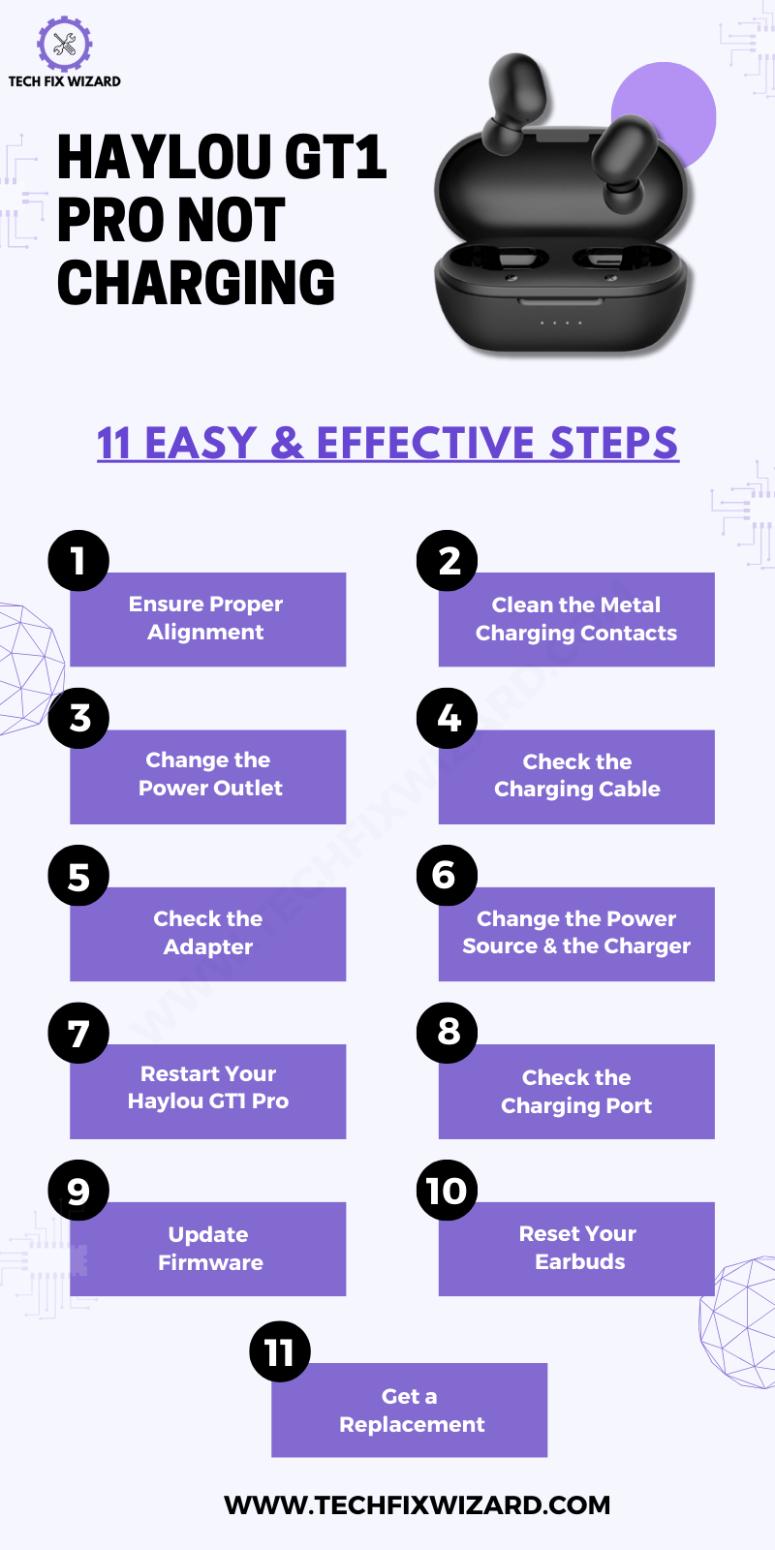
- 1 Troubleshooting Haylou GT1 Pro Not Charging Issue in 11 Simple Steps
- 2 1. Ensure Proper Alignment
- 3 2. Clean the Metal Charging Contacts
- 4 3. Change the Power Outlet
- 5 4. Check the Charging Cable
- 6 5. Check the Adapter
- 7 6. Change the Power Source and the Charger
- 8 7. Restart Your Haylou GT1 Pro
- 9 8. Check the Charging Port
- 10 9. Update Firmware
- 11 10. Reset Your Earbuds
- 12 11. Get a Replacement
- 13 FAQs
- 14 1. How do you fix earbuds that are not charging?
- 15 2. Why is one side of my Haylou earbuds not charging?
- 16 3. How do I know if my Haylou GT1 Pro is charging?
- 17 4. How long does it take to charge Haylou GT1 Pro?
- 18 5. Can I shower with Haylou GT1 Pro?
- 19 6. How do I know when my Haylou GT1 case is fully charged?
- 20 7. How long does Haylou GT1 Pro last?
- 21 8. How do I know when my Haylou GT1 case is fully charged?
Troubleshooting Haylou GT1 Pro Not Charging Issue in 11 Simple Steps
The following steps are designed to guide you through the process of resolving the Haylou GT1 Pro Not Charging issue effortlessly.
Let’s dive into the troubleshooting process and get your earbuds charging like they should.
1. Ensure Proper Alignment
To troubleshoot charging issues with your Haylou GT1 Pro earbuds, begin by ensuring proper alignment. This is very important to establish a secure connection between the earbuds and the charging case.
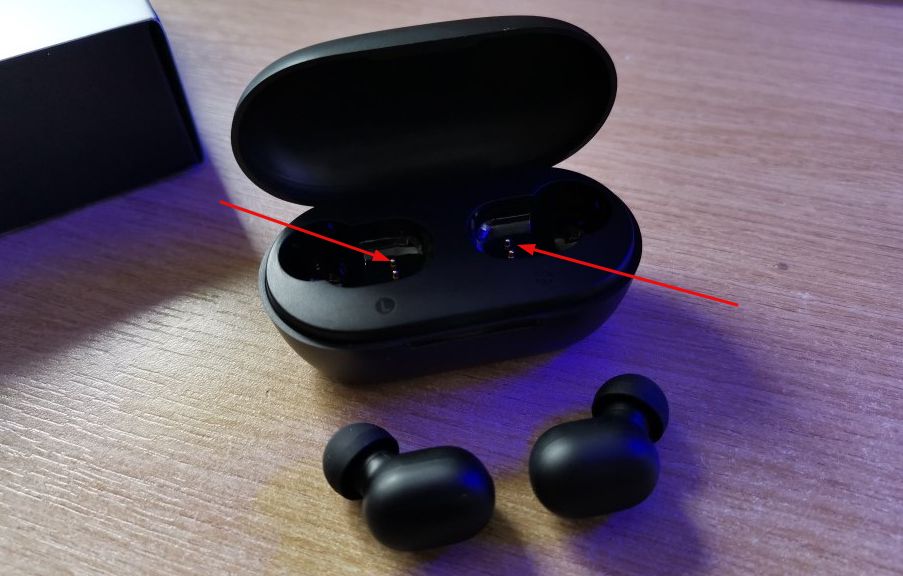
Make sure that you correctly place the earbuds in their respective slots within the charging case. Ensure they are seated snugly and that the charging pins on the earbuds align with the corresponding pins in the case.
Proper alignment ensures that the charging process can commence without interruptions.
Also Check:
- How To Fix Oppo Enco W11 Not Charging – 7 Quick Troubleshooting Steps
- Jlab Earbuds Not Charging – Try These 7 Steps
2. Clean the Metal Charging Contacts
After verifying the alignment of the earbuds in the charging case, inspect the metal charging contacts on both the earbuds and it’s the case. Over time, dust or debris may accumulate on these contacts affecting the charging process.
Carefully examine the contacts, and if you notice any grime, use a clean, dry cloth or a cotton swab to gently clean them.
This step is a simple one, but it can make a significant difference and is essential for maintaining a clean and reliable connection between the earbuds and the charging case.
3. Change the Power Outlet
If the earbuds still aren’t charging, consider the power source. Sometimes, the issue may be as simple as a non-functioning power outlet or USB port you are using.
This concern related to the power outlet can very easily be ruled out by unplugging the charging case from it and plugging it into a different outlet or by using a voltage tester to confirm the outlet’s functionality.
Ensure that the new power source is functioning correctly. Changing the power outlet can resolve problems related to unstable power supply.
Also, Read:
- Jabra Elite 75t Not Charging – Follow These Effective Fixes
- Sesh Evo Case Not Charging – 7 Easy Solutions To Try
4. Check the Charging Cable
Moving on to the next step, assess the condition of the charging cable. A damaged or frayed cable can affect the charging process.
Inspect the cable for any visible signs of wear or damage, such as exposed wires or bent connectors. If you notice any issues, it’s advisable to replace the cable with a new one that is in good condition.
because a reliable charging cable is essential for efficient charging.
5. Check the Adapter
Another potential source of charging problems could be the power adapter. So you need to verify that the power adapter you are using is in proper working order and provides the necessary voltage for your earbuds.
If there are doubts about the adapter’s functionality, try using a different one that you know works well.
6. Change the Power Source and the Charger
If none of the previous steps resolve the issue, consider changing both the power source and the charger itself.
Swap out your current charger for a different one and try charging the earbuds from an alternative power source.
This step can better identify if the problem lies with the original charger or the power supply, allowing you to pinpoint the exact issue and take appropriate action.
7. Restart Your Haylou GT1 Pro
If the earbuds are still not charging or connecting properly, then it’s time to restart them.
- Start by disabling Bluetooth on your paired device to prevent any interference.
- Then, place the earbuds back into their charging case and ensure they are properly aligned with the charging pins.
- Wait for about 10-15 seconds, allowing the earbuds to reset.
- Next, open the lid of the charging case and carefully remove the earbuds.
- Turn on Bluetooth on your paired device and re-pair the earbuds.
This process can resolve minor connectivity issues and restore normal functionality.
Quick Reads:
- JLab Headphones Not Charging – 8 Steps To Resolve The Issue
- Indy Evo Not Charging – [FIXED] 8 Steps To Try
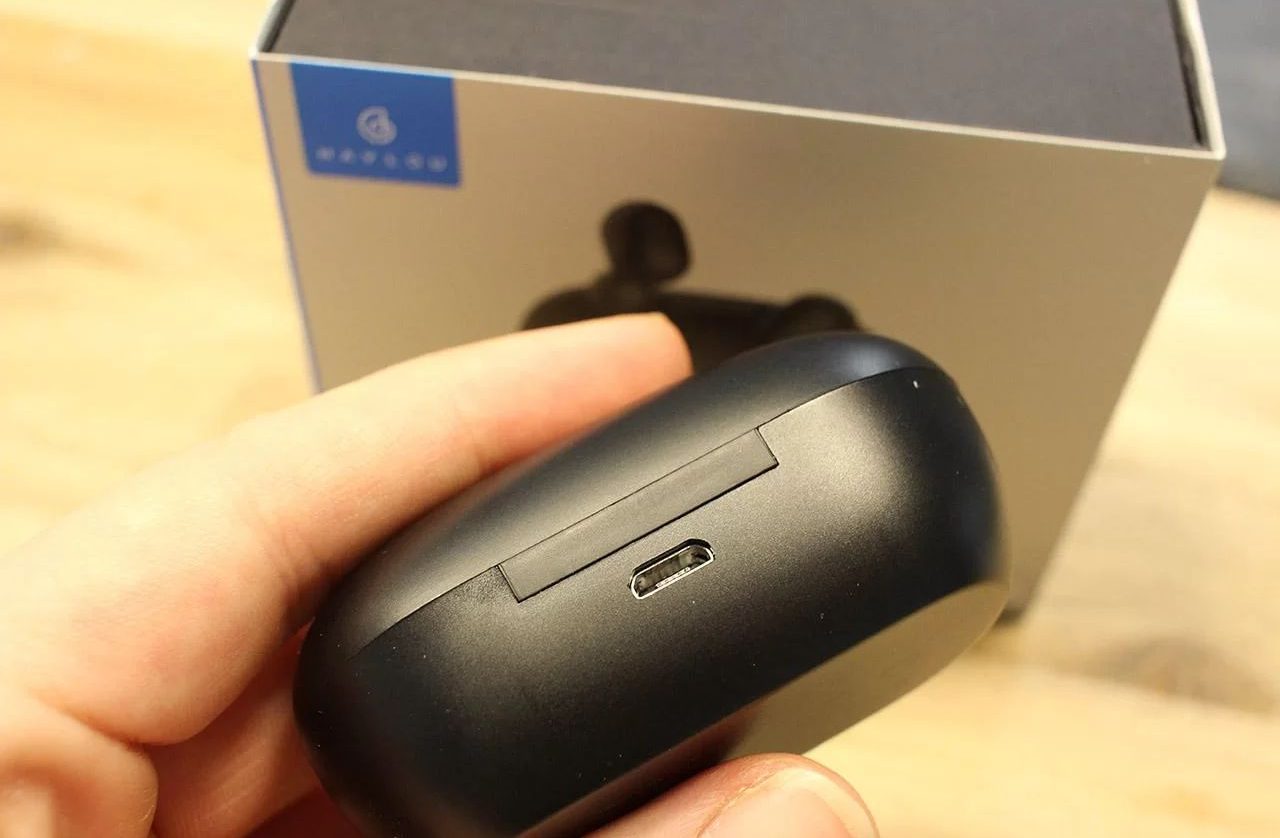
8. Check the Charging Port
To further troubleshoot charging problems, inspect the charging port on the earbuds themselves. Sometimes, debris or dust may accumulate in this area, hindering the connection with the charging case.
Gently examine the charging port, and if you notice any foreign particles, carefully clean it using a soft brush or compressed air.
This step ensures that the earbuds make a secure connection with the charging case, allowing for effective charging.
9. Update Firmware
Staying up-to-date with firmware is vital for resolving software-related issues. Sometimes the not charging issue is directly stemming from software glitches.
First, ensure that your Haylou GT1 Pro earbuds are fully charged to prevent any interruptions during the update process.
- Connect the earbuds to your smartphone or tablet using Bluetooth.
- Then, open the Haylou app on your device.
- If a firmware update is available, the app will notify you.
- Click on the “Update” button to initiate the update process.
It’s crucial not to disconnect the earbuds from your device while the update is in progress.
Once the update is complete, the earbuds will automatically disconnect and restart, potentially resolving software-related issues.
10. Reset Your Earbuds
If the problem persists, a complete reset of your earbuds may be necessary. So, you should give it a try as well.
- Begin by unpairing the earbuds from your device.
- Place them back into the charging case and ensure they are properly seated.
- Next, press and hold the touch sensor on both earbuds for approximately 10-15 seconds, or until you see red and white lights blinking.
This indicates that the earbuds have reset and are ready to pair. Remove them from the case and re-pair them with your device. This step can resolve more complex issues related to connectivity and settings.
11. Get a Replacement
If none of the previous steps successfully resolve the problems with your Haylou GT1 Pro earbuds, and they still do not charge or function correctly, it may be time to consider seeking a replacement.
Contact the manufacturer or the place of purchase to inquire about warranty service or replacement options.
FAQs
1. How do you fix earbuds that are not charging?
If your earbuds are not charging, start by cleaning the charging ports and contacts on both the earbuds and the charging case. Ensure that the charging cable is working and try different charging sources. If the issue persists, check if the earbuds need a firmware update or reset them according to the manufacturer’s instructions.
2. Why is one side of my Haylou earbuds not charging?
One-sided charging issues could be due to dirty or damaged charging pins, a low battery, or a connection problem between the earbud and the case. Inspect the pins and clean them gently. Ensure the earbud is properly seated in the charging case and that the case itself has enough charge.
3. How do I know if my Haylou GT1 Pro is charging?
When you place the Haylou GT1 Pro earbuds in the charging case and close it, you should see LED indicators on the case light up. The lights usually indicate that the earbuds are charging. Consult the user manual for specific LED patterns that confirm the charging status.
4. How long does it take to charge Haylou GT1 Pro?
The charging time for the Haylou GT1 Pro varies, but it typically takes around 1.5 to 2 hours to fully charge both the earbuds and the charging case when they are completely depleted.
5. Can I shower with Haylou GT1 Pro?
Yes, you can shower with Haylou GT1 Pro. They have an IPX5 water resistance rating, which means they can withstand light to moderate water spray. This means that they should be able to withstand the water from a showerhead, but you should avoid submerging them in water or exposing them to direct streams of water.
6. How do I know when my Haylou GT1 case is fully charged?
The charging case of the Haylou GT1 typically has LED indicators that show the charging status. When the case is fully charged, the LEDs should stop blinking or change to a solid green, depending on the manufacturer’s design.
7. How long does Haylou GT1 Pro last?
The Haylou GT1 Pro earbuds can last around 3.5 to 4 hours on a single charge, and the charging case can provide additional charges, extending the total usage time.
8. How do I know when my Haylou GT1 case is fully charged?
As mentioned earlier, the Haylou GT1 case usually has LED indicators. When the case is fully charged, the LEDs will stop blinking or display a steady light, indicating that it’s ready to charge your earbuds.

John Paul is a tech enthusiast dedicated to troubleshooting. He is passionate about fixing glitches, simplifying complexities, and empowering others in the digital realm.
