In today’s world, television serves as an essential source of entertainment and information. However, dealing with a Sony BRAVIA TV not working can be an infuriating experience.
A variety of issues, ranging from power supply problems to software glitches, can cause a Sony BRAVIA TV to malfunction, resulting in a black screen, no sound, or other puzzling symptoms.
In this guide, we will delve into the common problems that can render your Sony BRAVIA TV unresponsive and explore troubleshooting steps to help you regain control of your entertainment hub.
Contents
- 1 How to Resolve Sony BRAVIA TV Not Working Issue?
- 2 1. Check Power Connection
- 3 2. Use the Power Button to Turn On
- 4 3. Troubleshoot Malfunctioning Remote (If Required)
- 5 4. Perform Hard Reset
- 6 5. Disconnect External Device Cables
- 7 6. Change Input Channel
- 8 7. Update Firmware
- 9 8. Reset to Factory Default Settings
- 10 9. Hardware Issue
- 11 FAQs
- 12 1. Why is my Sony Bravia TV not turning on?
- 13 2. Why is my Sony BRAVIA TV not turning on at all?
- 14 3 What should I do if my Sony BRAVIA TV displays a black screen?
- 15 4. Why is my Sony BRAVIA TV’s red light blinking?
- 16 5. How can I troubleshoot my Sony BRAVIA TV’s remote control?
- 17 6. Why are the streaming apps on my Sony BRAVIA Smart TV not working?
- 18 7. My Sony BRAVIA TV freezes or crashes frequently?
- 19 8. How can I resolve audio issues on my Sony BRAVIA TV, like no sound or distorted sound?
- 20 9. What should I do if my Sony BRAVIA TV displays abnormal colors or flickers?
- 21 10. How to fix the Sony Bravia TV red light blinking?
- 22 11. How to fix Sony Bravia screen problems?
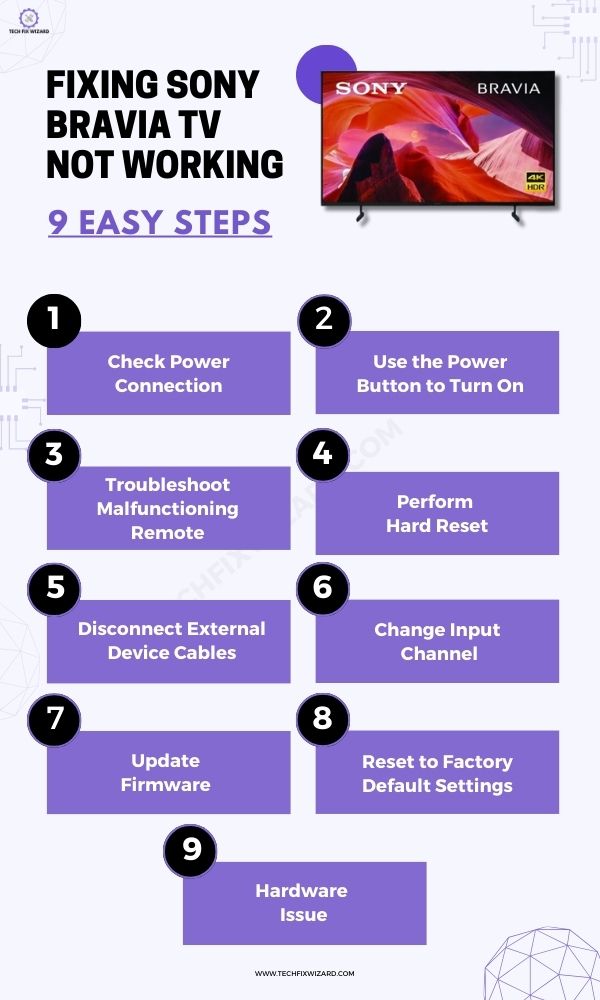
How to Resolve Sony BRAVIA TV Not Working Issue?
To resolve issues with your BRAVIA TV, follow the steps below. These steps will assist in resolving basic issues like the TV not turning on as well as other screen or video-related problems.
Let’s get into it!
1. Check Power Connection
A fundamental first step in resolving issues with your Sony BRAVIA TV is to ensure that the power connection is secure and intact.
This involves checking if the power cord is properly connected to your TV. It’s crucial to inspect the connection between the AC power adapter and the power cord as well, looking for any visible damage or loose connections.
A loose or damaged power connection can lead to power-related issues, causing the TV to not turn on or display a black screen.
Make sure to also verify the power outlet’s functionality by connecting another device or testing it with a multimeter. Additionally, consider checking the circuit breaker associated with the specific power outlet for any issues.
2. Use the Power Button to Turn On
If you’ve been trying to turn on your TV with the remote control but haven’t had any success, you can try using the TV’s physical power button as an alternative.
The power button can typically be found on the front or back of the TV. Here’s what you can do:
- Locate the power button on your TV; it is usually situated on the front or back of the TV.
- Press the power button to attempt turning on the TV.
- If the TV powers on successfully using the physical power button, it suggests that the TV itself is functioning correctly. In this case, the issue may have been with the remote control, such as dead batteries or a malfunctioning remote.
Also Read: Hisense TV HDMI Not Working – 8 Quick & Effective Steps To Fix
3. Troubleshoot Malfunctioning Remote (If Required)
If your TV turns on and functions as expected using the power button, the issue may be attributed to the remote control itself. To delve into this aspect, remove the batteries from the remote control and inspect them. Replace the batteries with new ones if necessary.
After inserting the fresh batteries test if the TV responds to remote commands. This step refines the troubleshooting process by ruling out remote-related issues, which can sometimes be the root cause of perceived TV malfunctions.
4. Perform Hard Reset
If the previous steps have not resolved the issue, a hard reset is the next logical step. A hard reset provides a comprehensive reboot of the TV system.
To perform this:
- Unplug the TV from the wall socket.
- Find the TV’s power button and press/hold it for about 30 seconds to discharge residual power and initiate a complete reset.
- Wait for about one minute to ensure the TV fully powers down.
- Reconnect the TV to the wall socket.
- Check if the issue is resolved.
The hard reset is a powerful tool for addressing stubborn software issues.
Also Check:
- Hisense TV Volume Not Working – 16 Easy Must-Try Solutions
- Vizio TV Volume Control Not Working – 12 Steps To Resolve
5. Disconnect External Device Cables
If the TV still doesn’t work after the hard reset, consider the role of external devices. These can sometimes introduce complications.
Begin by disconnecting any external devices connected via HDMI, USB, LAN, or other ports.
Testing whether the TV turns on without external connections can help identify if a specific device or cable is causing the problem. This step is valuable in maintaining the simplicity of the process while considering the broader TV setup.
6. Change Input Channel
If your TV is on but not displaying a picture, it’s important to check the input channel. Simply changing the input channel on the TV can help resolve issues related to selecting the correct source.
Sometimes, the TV might be on the right source, but the input settings are not configured correctly. Trying different input channels can help in identifying and fixing this particular issue.
To change the input channel on a Sony Bravia TV, you can use either the remote control or the physical buttons on the TV itself.
Using the remote control:
- Press the INPUT button on the remote control.
- Use the arrow keys to navigate to the desired input channel.
- Press the ENTER button to confirm your selection.
Using the physical buttons on the TV:
- Locate the INPUT button on the back or side of the TV.
- Press the INPUT button repeatedly to scroll through the input channels.
- When the desired input channel is highlighted, press the ENTER button to confirm your selection.
7. Update Firmware
This step remains relevant when your TV is powered on but fails to function as expected. This can include issues like a black screen, connectivity problems, or audio and video-related glitches.
Keeping your TV’s firmware up to date is crucial for ensuring smooth operation and addressing potential software bugs. Sony regularly provides firmware updates to improve your TV’s functionality and performance.
To check for updates:
- Press “Home” on the remote.
- Navigate to “Settings.”
- Access “Customer Support.”
- Enable “Automatic Software Download.”
- Initiate the software update.
- Allow the TV to update and reboot.
- Confirm and complete the update process.
8. Reset to Factory Default Settings
When the issue persists, a deeper software reset may be required. To reset the TV to factory default settings
- Ensure the TV is turned on.
- On the TV, locate the physical buttons on the bottom.
- Using the TV’s remote, press and hold the “Up” button.
- While holding the “Up” button on the remote, press the power button on the TV.
- Continue holding the “Up” button on the remote until the TV displays the “Reset” option on the screen.
- Release the remote’s “Up” button.
- Select “Reset” on the TV screen to confirm the factory reset.
The TV will then perform the factory reset, and once it’s complete, it will restart and prompt you to go through the initial setup process, including language selection and Wi-Fi setup.
After going through these basic steps, test the TV to see if it works as expected.
9. Hardware Issue
If, even after trying all the previous troubleshooting steps, your Sony BRAVIA TV still doesn’t work, the problem might be related to its hardware. In such situations, it’s a good idea to contact Sony’s customer support for repairs or warranty claims.
You can also opt for professional repair services, ensuring that experts assess and fix any hardware problems your TV may have. A service center or technician can diagnose and rectify underlying hardware issues that might be causing the TV malfunction.
This step serves as the final resort to ensure the TV’s proper functioning.
You Might Like: Zenith TV Not Turning On – 7 Quick & Easy Fixes To Try
FAQs
1. Why is my Sony Bravia TV not turning on?
If your Sony Bravia TV is not turning on, first ensure the power cord is securely connected and the outlet is functioning. Try a hard reset by unplugging the TV, holding the power button for 30 seconds, waiting for a minute, and plugging it back in. If it still won’t turn on, consult a professional technician for further diagnosis and repair.
2. Why is my Sony BRAVIA TV not turning on at all?
Check for power supply problems. Ensure the power cord is securely connected and try a hard reset.
3 What should I do if my Sony BRAVIA TV displays a black screen?
Verify cable connections, update software, and switch inputs. Contact support if needed.
4. Why is my Sony BRAVIA TV’s red light blinking?
A blinking red light can signal various issues. Perform a power cycle and contact Sony support or a technician if it continues.
5. How can I troubleshoot my Sony BRAVIA TV’s remote control?
Check remote batteries, clear obstructions, and ensure the IR sensor is clean.
6. Why are the streaming apps on my Sony BRAVIA Smart TV not working?
Confirm your internet connection, update apps, and clear your cache. Perform a factory reset if necessary.
7. My Sony BRAVIA TV freezes or crashes frequently?
Restart the TV, update the software, and ensure proper ventilation. Seek manufacturer’s support if issues persist.
8. How can I resolve audio issues on my Sony BRAVIA TV, like no sound or distorted sound?
Check audio settings, unmute the TV, and review audio connections. Update audio drivers if necessary.
9. What should I do if my Sony BRAVIA TV displays abnormal colors or flickers?
Inspect cable connections, use a different HDMI cable or port, and verify resolution settings. Update display drivers as needed.
10. How to fix the Sony Bravia TV red light blinking?
A blinking red light on a Sony Bravia TV can indicate various issues, such as a power supply problem or a malfunctioning circuit. To address this, unplug the TV, wait for a minute, and plug it back in. If the issue persists, consider contacting Sony’s customer support or a technician for specific troubleshooting based on your TV’s model.
11. How to fix Sony Bravia screen problems?
To fix Sony Bravia screen problems like a black screen or display abnormalities, ensure cables are properly connected and the TV is receiving power. Try switching to different input sources and update your TV’s software and firmware. If the issue persists, consult the user manual for model-specific troubleshooting or seek professional assistance.

John Paul is a tech enthusiast dedicated to troubleshooting. He is passionate about fixing glitches, simplifying complexities, and empowering others in the digital realm.