Facing the “Hisense TV HDMI Not Working” scenario can be infuriating, especially when you’re excited to watch your favorite shows or play some games.
These issues can come from simple stuff like the cable not being plugged in correctly to more complicated things like hardware or software problems.
In this troubleshooting guide, we’ll go through things step by step to figure out what’s going on. The goal is to make sure your Hisense TV talks smoothly with your connected devices through the HDMI port.
So, let’s dive into this guide and make sure your Hisense screen is ready for some seamless viewing.
Contents
- 1 Troubleshooting Hisense TV HDMI Not Working – 8 Steps
- 2 1. Verify Physical Connections
- 3 2. Check the HDMI Port
- 4 3. Assess the Input Source
- 5 4. Test with Another Device
- 6 5. Use the Power Cycle Method
- 7 6. Verify Compatibility
- 8 7. Update Software
- 9 8. Perform a Factory Reset
- 10 FAQs
- 11 1. Why is my Hisense TV not reading my HDMI?
- 12 2. How do I get HDMI on my Hisense TV?
- 13 3. What to do if the HDMI port is not working on the Hisense TV?
- 14 4. What causes HDMI to stop working?
- 15 5. How do I reset my HDMI port?
- 16 6. How can I test my HDMI cable?
- 17 7. How do you know if your HDMI is damaged?
- 18 8. How do I know if HDMI is input or output?
- 19 9. What does an HDMI connection look like?
- 20 10. What is an HDMI input signal?
- 21 11. How do I test my HDMI 2.1 cable?
Troubleshooting Hisense TV HDMI Not Working – 8 Steps
The following steps can be taken to troubleshoot and resolve issues with your Hisense TV.
1. Verify Physical Connections
Start by ensuring that the HDMI cable is securely plugged into both the HDMI port on your Hisense TV and the device you want to connect, whether it’s a cable box or gaming console.
Gently wiggle the connectors to make sure they’re snug. If the connection feels loose, it could result in intermittent signal loss or a complete lack of connection.
To rule out any cable-related issues, try swapping the HDMI cable with a known working one.\
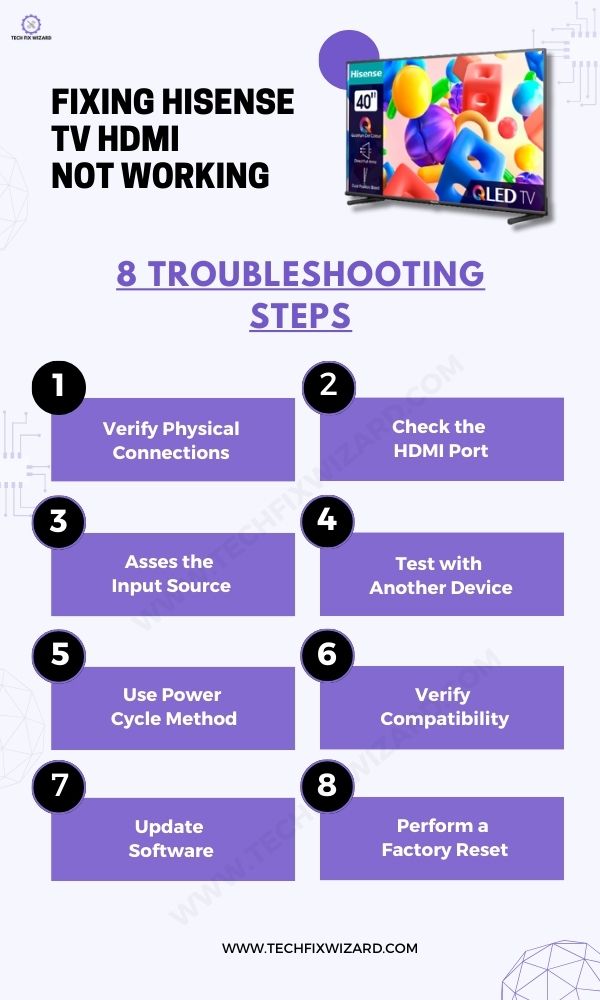
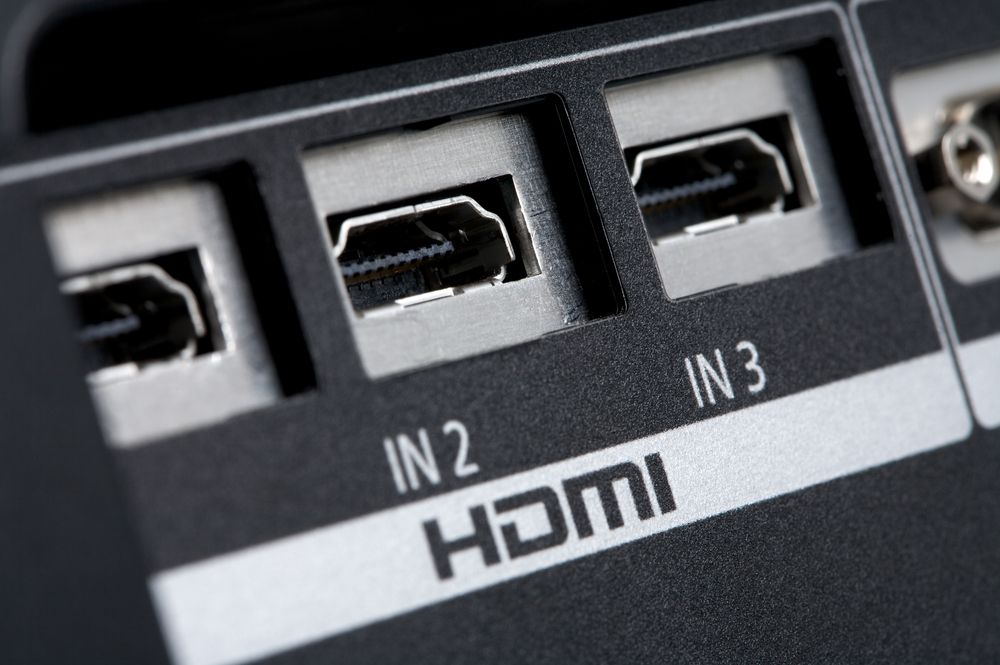
2. Check the HDMI Port
Next experiment by connecting your device to different HDMI ports on your Hisense TV. If you notice that one particular port is causing issues, it could be indicative of a faulty port. In such cases, it’s essential to investigate further.
Take a closer look at the HDMI ports on your Hisense TV for any signs of physical damage, such as bent pins or accumulated debris. These issues might hinder the proper functioning of the port and lead to connectivity problems.
In this situation consider cleaning the port or it’s advisable to consider seeking professional repair services or reaching out to the manufacturer for any visible physical damage.
Also Check: Hisense TV Volume Not Working – 16 Easy Must-Try Solutions
3. Assess the Input Source
The next step is to confirm that you’ve selected the right HDMI input corresponding to the port where your device is connected.
Hisense TVs often have multiple HDMI ports, and it’s surprisingly easy to accidentally choose the wrong one. This innocent mistake can result in that frustrating “no signal” message on your screen.
Let’s say you’re connecting a modern device that uses HDMI 2.0. Now, in this case, you’d want to confirm that you’ve selected the corresponding HDMI input labeled “HDMI 2” or something similar.
Selecting, for instance, “HDMI 1” when your device is plugged into “HDMI 2” might lead to the dreaded “no signal” scenario.
Take that extra moment to ensure your Hisense TV is tuned into the precise HDMI input that aligns with the capabilities of your connected device, whether it’s HDMI 1.4, HDMI 2.0, or another version.
This simple check can make a world of difference in resolving HDMI-related issues.
4. Test with Another Device
Consider this step as a diagnostic test for your HDMI puzzle. Take the HDMI cable that’s causing the hiccup and use it to connect a different device, perhaps another TV or monitor. This step serves as a crucial litmus test.
If the issue persists on the alternative device, it’s a sign that the problem may lie within the Hisense TV itself. This could be due to a faulty HDMI port or even a glitch in the TV’s software.
On the flip side, if the HDMI connection works seamlessly with the alternative device, it’s a strong indication that the original device or its settings might be the culprit.
5. Use the Power Cycle Method
Next, consider power cycling your devices. This process serves as a reset mechanism, specifically designed to address temporary software glitches that may be causing the issue.
Follow these steps to perform a power cycle:
- Turn off the TV by unplugging the power cord from the wall outlet.
- Wait for 30 seconds.
- Flip the TV’s power switch back on after a brief pause for a reset.
- If the HDMI problem persists, opt for a more direct reset approach.
- Turn off the TV once again.
- Unplug the HDMI cable from the back of the TV.
- Power on the TV without the HDMI cable connected.
- Once the TV is operational, reinsert the HDMI cable.
This step-by-step reset can help eliminate stubborn glitches in the HDMI connection, restoring smooth streaming functionality.
People Also Liked: Zenith TV Not Turning On – 7 Quick & Easy Fixes To Try
6. Verify Compatibility
It’s crucial to ensure that both devices speak the same language in terms of HDMI specifications. Take a moment to confirm the compatibility between your device and the Hisense TV.
For instance, if you’re attempting to connect a cutting-edge HDMI 2.1 device to an older TV equipped with HDMI 1.4 ports, you might encounter compatibility issues that could be the root cause of the HDMI not working problem.
To tackle this, refer to the manuals accompanying your device and the Hisense TV. These manuals typically provide detailed information about supported HDMI standards.
Check for any specific requirements or limitations, and ensure that the HDMI standards of your device align with the capabilities of your TV.
7. Update Software
Visit the Hisense website to check for software updates for your TV. Follow the instructions provided by the manufacturer to update the TV’s firmware.
Software updates often address bugs and improve overall system stability, potentially resolving HDMI-related issues.
Ensure that your Smart Hisense TV is set up for Over-the-Air (OTA) firmware updates by following these steps:
- First, press the Home button on your remote.
- Next, navigate to the settings represented by the “cog” icon, then proceed to Support and System Update.
- Confirm that the Auto Firmware Upgrade option is activated.
In case your TV lacks OTA support, you can still check for updates with the following steps:
- Press the Home button on your remote, and click the cog icon > All > About > System Update.
After updating your TV, check if the issue is resolved.
8. Perform a Factory Reset
If all else fails, consider performing a factory reset on your Hisense TV. Keep in mind that this step erases all personalized settings, returning the TV to its original state.
Use this step as a last resort when other troubleshooting methods have not resolved the HDMI issue.
To perform a factory reset:
- Press the Home button on your remote.
- Then the “cog” icon > Device Preferences > Reset > Erase everything.
After this your TV will restart, having reset to default factory settings.
However, if you fail to resolve the issue even after trying all the above troubleshooting steps, then reach out to Hisense customer service to assist you.
Read:
- Vizio TV Screen Goes Black – 14 Effective Steps To Resolve
- Vizio TV Volume Control Not Working – 12 Steps To Resolve
FAQs
1. Why is my Hisense TV not reading my HDMI?
If your TV is not reading your HDMI, there could be several reasons for the issue. First, ensure that both ends of the HDMI cable are securely connected to the TV and the device you’re trying to connect.
Additionally, check if the HDMI port on your TV is functional by trying another port. It’s also a good idea to power cycle both the TV and the connected device to refresh the connection.
2. How do I get HDMI on my Hisense TV?
To access HDMI on your Hisense TV, make sure your HDMI cable is connected securely to the HDMI port on the TV and the corresponding port on your external device, such as a gaming console or Blu-ray player.
Once connected, use the TV remote to navigate the input/source menu. Select the HDMI input to which your device is connected, and you should see the content from your external device on the TV screen.
3. What to do if the HDMI port is not working on the Hisense TV?
If the HDMI port on your TV is not working, try the following steps. First, check the physical condition of the HDMI port for any damage or debris.
If it appears fine, try connecting the device to a different HDMI port on the TV. If none of the ports work, there may be an issue with the TV’s hardware, and you may need to contact Hisense customer support for further assistance or consider professional repair services.
4. What causes HDMI to stop working?
Several factors can cause HDMI to stop working, including loose cable connections, damaged HDMI ports, faulty cables, or issues with the connected devices.
Environmental factors such as power surges can also contribute to HDMI problems. Additionally, firmware or software issues on the TV or connected devices may lead to HDMI-related issues.
5. How do I reset my HDMI port?
To reset an HDMI port, start by unplugging both the TV and the connected device from the power source. Leave them unplugged for at least 10 minutes to allow any residual charge to dissipate.
Afterward, reconnect the HDMI cable and power up both the TV and the device. This power cycle can sometimes help reset the HDMI port and resolve connectivity issues.
6. How can I test my HDMI cable?
You can test your HDMI cable by connecting it to a different device that you know is working with HDMI. If the second device recognizes the HDMI connection, the cable is likely functioning correctly.
Alternatively, you can use an HDMI cable tester, which provides a more comprehensive assessment of the cable’s integrity.
7. How do you know if your HDMI is damaged?
Visual inspection is the first step in determining if your HDMI cable is damaged. Check for any obvious signs of wear, bent pins, or frayed edges.
If the cable looks physically intact, test it with another device to see if it establishes a connection. If there’s still no signal, consider using a known working HDMI cable to rule out potential issues with the connected device or TV.
8. How do I know if HDMI is input or output?
HDMI ports on devices are labeled either as “HDMI In” or “HDMI Out.” If it’s labeled as “HDMI In,” it is meant to receive signals from an external device, such as a gaming console or Blu-ray player.
Conversely, if it’s labeled as “HDMI Out,” it is an output port used to send signals from the device to another display, such as a TV or monitor.
9. What does an HDMI connection look like?
An HDMI connection typically involves a small, rectangular connector with a flat bottom and beveled edges. The cable has a distinctive 19-pin configuration.
HDMI connections transmit both audio and video signals, making them a versatile and widely used interface for various electronic devices.
10. What is an HDMI input signal?
An HDMI input signal refers to the audio and video signals transmitted through an HDMI cable from an external device to a display, such as a TV.
This can include signals from devices like gaming consoles, Blu-ray players, or streaming devices, allowing the TV to showcase content from these sources.
11. How do I test my HDMI 2.1 cable?
Testing an HDMI 2.1 cable involves ensuring that it meets the specifications for high-resolution video, high refresh rates, and advanced features like Variable Refresh Rate (VRR) and Auto Low Latency Mode (ALLM).
Connect the HDMI 2.1 cable to a compatible device and display, and verify that the supported features are functioning correctly. Some devices may have built-in diagnostics for HDMI 2.1 compatibility.

John Paul is a tech enthusiast dedicated to troubleshooting. He is passionate about fixing glitches, simplifying complexities, and empowering others in the digital realm.