If your Miele vacuum cleaner isn’t turning on, you might be feeling frustrated and unsure about what to do.
Don’t worry; you’re not alone!
In this guide, we’ll walk you through some common reasons why your Miele vacuum might not be working and offer simple solutions to get it up and running again.
Contents
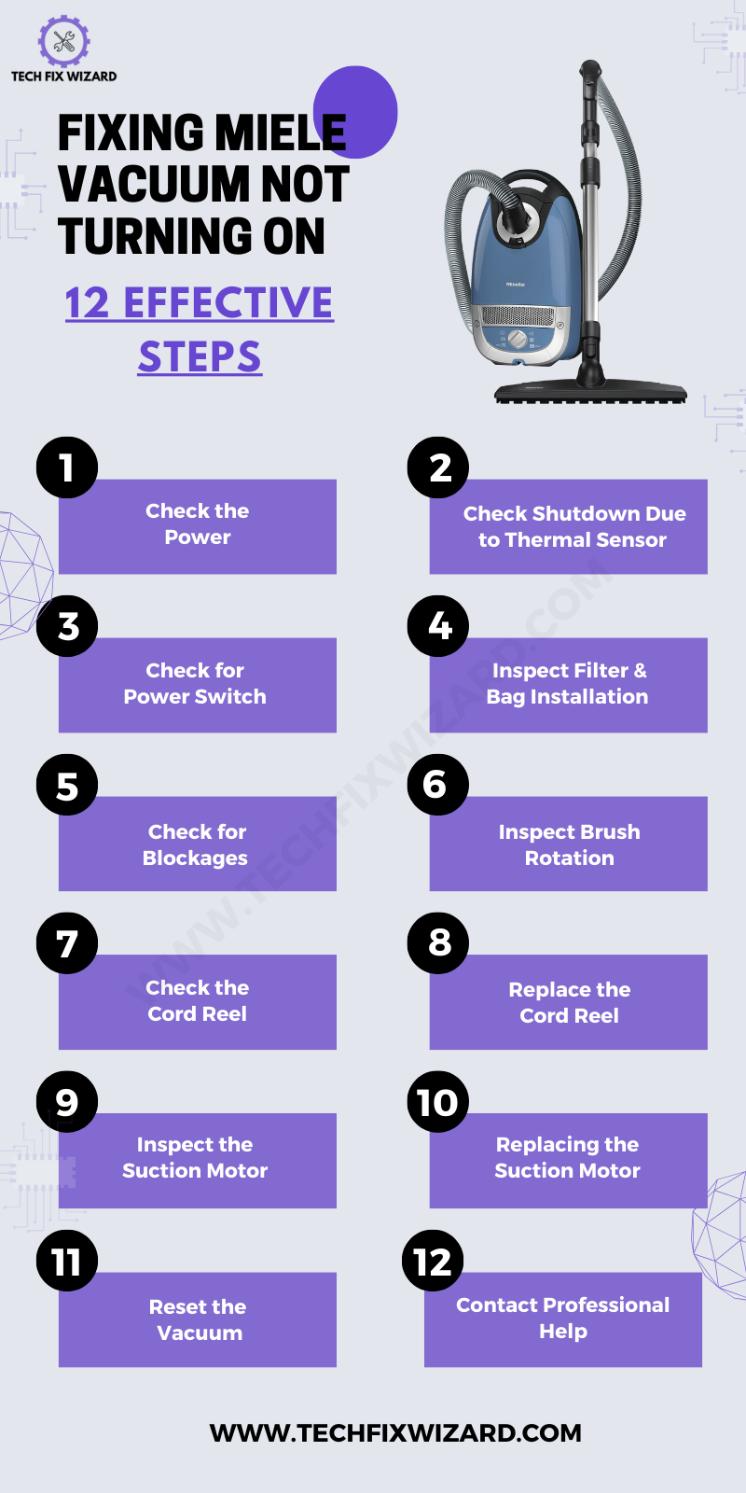
- 1 Fixing Miele Vacuum Not Turning On – 12 Steps
- 2 1. Check the Power
- 3 2. Check Shutdown Due to Thermal Sensor
- 4 3. Check for Power Switch
- 5 4. Inspect Filter and Bag Installation
- 6 5. Check for Blockages
- 7 6. Inspect Brush Rotation
- 8 7. Check the Cord Reel
- 9 8. Replace the Cord Reel (If Needed):
- 10 9. Inspect the Suction Motor
- 11 10. Replacing the Suction Motor
- 12 11. Reset the Vacuum
- 13 12. Contact Professional Help
- 14 FAQs
- 15 1. Why is my vacuum suddenly not turning on?
- 16 2. Where is the reset button on Miele?
- 17 3. Why is my Miele vacuum suddenly shut off?
- 18 4. Why is my Miele stick vacuum not working?
- 19 5. Why did my cordless vacuum stop working?
- 20 6. What is the common problem of a vacuum cleaner?
- 21 7. Why is my vacuum not charging?
Fixing Miele Vacuum Not Turning On – 12 Steps
Following are several troubleshooting steps you can follow to resolve the issue, ensuring your vacuum is back in action quickly and efficiently.
Let’s dig into it!
1. Check the Power
Start by checking if the power outlet you’re using is functional. Ensure it’s receiving power by testing it with another device.
It’s important to confirm that the circuit breaker on your home’s electrical panel hasn’t been tripped, as this can result in a loss of power to the outlet.
Check for the Battery:
If you have a cordless vacuum, make sure it has enough battery charge to operate. If the battery is depleted, charge it before attempting to use the vacuum.
2. Check Shutdown Due to Thermal Sensor
If your vacuum powers on but unexpectedly shut off while in operation, it could be due to the activation of a thermal sensor. This typically occurs when the vacuum overheats, often because of blockages or other related issues.
To resolve this, allow the vacuum to cool for approximately three hours to allow the thermal sensor to reset. If it powers on again, promptly switch it off to address any potential clogs that may be causing overheating.
Also Read: Dyson Vacuum Not Charging – Let’s Resolve It [11 Steps To Follow]
3. Check for Power Switch
Examine the vacuum’s power switch. Ensure it’s functioning correctly and not stuck in the “off” position. If the switch appears to be faulty or isn’t responding, you may need to perform a continuity test using a multimeter to determine if it needs replacement.
4. Inspect Filter and Bag Installation
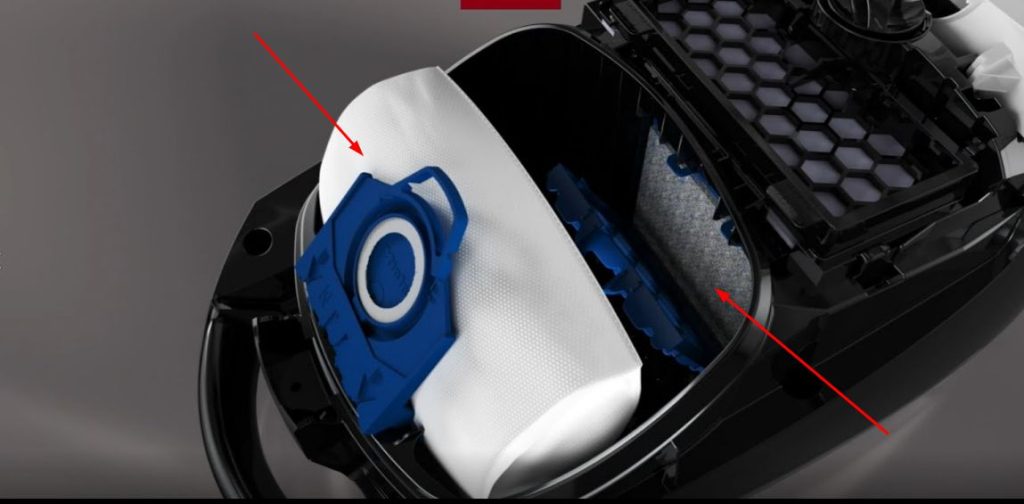
Ensuring optimal performance for your vacuum depends on having filters and bags correctly installed.
Here’s how to do it
Check that the filter and bag are securely in place within the vacuum. Pay close attention to the housing and confirm there are no gaps or loose fittings that could compromise their effectiveness.
Filters and bags that are not properly seated or have gaps can lead to reduced suction power and decreased cleaning efficiency.
Read Blog Posts: Eureka Cordless Vacuum Not Charging – [SOLVED] 8 Easy Fixes
5. Check for Blockages
Ensure there are no blockages in the following components to maintain proper vacuum function:
1. Powerhead:
Examine the powerhead closely, paying attention to the brush and intake areas. Remove any visible obstructions or tangled debris to allow for effective cleaning.
2. Vacuum Hose:
Disconnect the vacuum hose and inspect it thoroughly. Look for any clogs or blockages that might hinder airflow. Clear any obstructions using suitable tools or by gently pushing them out.
3. Miele Filters:
Access the Miele filters, including pre-motor and HEPA filters, as per your vacuum’s manual. Check for accumulated dirt and debris. If filters are dirty or clogged, clean or replace them according to manufacturer guidelines.
This step ensures optimal suction performance and prevents debris from being expelled during vacuuming.
6. Inspect Brush Rotation
The brush is a vital component for efficient cleaning. If your vacuum isn’t performing as expected or not turning on, it’s essential to examine the brush’s functionality.

1. Check Rotation:
Start by observing whether the brush is rotating properly when the vacuum is in operation. Ensure it’s spinning smoothly and without any unusual noises.
2. Safety Features:
Be aware that some vacuum models incorporate safety features that automatically halt the brush’s rotation upon encountering an obstruction.
3. Troubleshoot Obstructions
To address this issue, follow these steps:
- Turn off and unplug the vacuum for safety.
- Examine the brush area carefully for any entangled debris, such as hair or threads.
- Remove any obstructions that may impede the brush’s movement.
- If necessary, reset the brush according to your vacuum’s instructions.
May You Like Reading: Bissell CrossWave Not Charging – Try These 12 Essential Fixes
7. Check the Cord Reel
The cord reel plays a key role in managing the power cord by winding it when retracting it into the vacuum. To ensure smooth operation:
- Inspect Cord Reel: Examine the cord reel for any signs of issues or obstructions. Ensure it rotates effortlessly without any resistance or unusual sounds.
- Disassembly (if necessary): If you encounter problems with the cord reel, you may need to disassemble the vacuum to access and inspect it more closely.
8. Replace the Cord Reel (If Needed):
If you find that the cord reel is damaged or not functioning correctly, you should consider a replacement.
However, it’s crucial to emphasize that replacing the cord reel involves intricate steps. It’s advisable to attempt this task only if you have experience or confidence in handling such repairs.
Follow the steps below to replace the cord reel:
- Initiate the process by disconnecting the vacuum cleaner hose and accessing the bag and exhaust filter.
- Achieving full removal of the vacuum’s lid by carefully releasing the lid arms from their fixed positions.
- Progressing by removing the speed control box, accomplished through the unscrewing of a single screw and releasing two clips.
- After eliminating the speed control box, you can proceed to unscrew the plastic body of the vacuum cleaner from its base, thereby exposing the motor and cord reel.
- With the cord reel now visible, disconnect any wires linked to it and remove the securing screw.
- After successfully detaching the cord reel from the vacuum, it should be easily lifted out.
- Upon the complete removal of the old cord reel, you have the option to install a new one.
Read Blog Post: Shark Robot Not Connecting To Wi-Fi? 12 Simple Ways To Fix It
9. Inspect the Suction Motor
The suction motor in a vacuum plays a crucial role in creating the necessary airflow for effective cleaning. It generates the suction power that lifts dirt and debris from surfaces into the vacuum’s collection system.
You can think faulty suction motor as a possible cause of the problem you’re experiencing because it’s responsible for how the vacuum works. In cases like these, replacing it is the only solution.
Replacing a suction motor can be a complex task, involving intricate electrical connections and mechanical adjustments.
It’s advisable to seek professional help for this task, especially if you’re not experienced in such repairs. However, if you are confident in your skills, the following steps given in the following section will guide you through the process.
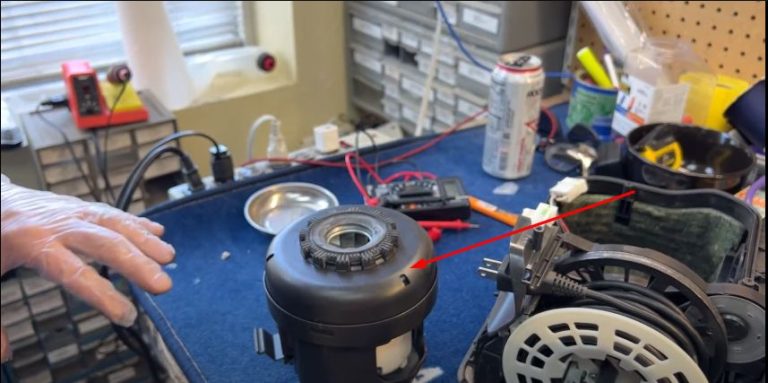
10. Replacing the Suction Motor
Follow the steps below to replace the suction motor:
- Carefully remove the motor from its housing, taking care not to damage it or the surrounding foam padding.
- Note the way each wire is connected to the motor before disconnecting them; this information is crucial for reconnecting the new motor correctly.
- Attach the new motor to the wires, making sure to replicate the previous wiring configuration.
- Wrap the new motor with foam padding to protect it.
- Reinstall the motor securely into its housing.
- Reassemble all other vacuum cleaner components.
- If the steps are followed correctly, your vacuum should now be functioning normally with the new motor.
11. Reset the Vacuum
Next, try resetting your vacuum, it might be a helpful troubleshooting step. Depending on your vacuum’s model, this reset can typically be achieved through a designated reset button or by following a specific sequence with the power switch.
Beyond addressing common issues, a reset can potentially resolve other malfunctions as well. For detailed and precise instructions on resetting your vacuum, please consult your vacuum’s user manual.
12. Contact Professional Help
In the context of the troubleshooting process mentioned earlier, it’s highly recommended to seek professional assistance for most repairs and replacements. However, the choice of tackling these tasks yourself is entirely up to you.
However, if you’ve reached a point where you’ve exhausted all your DIY skills and find yourself unable to make any progress, don’t hesitate to reach out to Miele’s support or a certified technician for guidance and assistance.
Trending Blog Posts:
FAQs
1. Why is my vacuum suddenly not turning on?
If your Miele vacuum isn’t turning on, there could be several reasons. First, check if it’s properly plugged into a working electrical outlet. If it is, inspect the power cord for any damage.
Additionally, some vacuums have a thermal overload switch that can trip if the motor overheats. Let it cool down for a while and try again. If the problem persists, it may require professional servicing.
Miele vacuums typically don’t have a traditional reset button. Instead, they often have safety features like thermal switches that automatically reset when the motor cools down.
If your vacuum isn’t working, follow the troubleshooting steps in your user manual or contact Miele customer support for guidance.
3. Why is my Miele vacuum suddenly shut off?
A sudden shutdown can be due to various factors. It could be a result of overheating or a clogged filter. Check if the vacuum is overheating and allow it to cool.
Inspect the filters and empty the dustbin, as a full dustbin can also cause a shutdown.
4. Why is my Miele stick vacuum not working?
A non-functioning Miele stick vacuum may be due to a dead battery. Ensure it’s charged properly. If the battery isn’t the issue, check for clogs in the brush head or the wand.
Also, examine the power switch and make sure it’s in the “on” position.
5. Why did my cordless vacuum stop working?
Cordless vacuums can stop working due to depleted batteries, clogs in the vacuum’s air pathway, or a faulty charger.
Start by checking the battery charge and cleaning out any blockages in the vacuum’s system. If it still doesn’t work, investigate the charger and the battery for any issues.
6. What is the common problem of a vacuum cleaner?
Common vacuum cleaner problems include loss of suction due to clogged filters or hoses, overheating, burnt-out motors, and worn-out belts.
Regular maintenance, such as cleaning filters and inspecting for blockages, can help prevent these issues.
7. Why is my vacuum not charging?
A vacuum that’s not charging may have a faulty charger, a damaged battery, or dirty battery terminals. First, ensure the charger is plugged in correctly and the outlet is working. If that doesn’t resolve the issue, check the battery and terminals for dirt or damage.
If problems persist, contact the manufacturer or seek professional repair.

John Paul is a tech enthusiast dedicated to troubleshooting. He is passionate about fixing glitches, simplifying complexities, and empowering others in the digital realm.