Encountering issues with your Eureka Cordless Vacuum not charging can be a frustrating setback in your cleaning routine.
A reliable cordless vacuum is an essential tool for maintaining a tidy living space, and when it doesn’t charge properly, it can disrupt your cleaning efficiency.
In this guide, we’ll delve into the common reasons why your Eureka Cordless Vacuum might be experiencing charging problems and provide practical solutions to help you troubleshoot and resolve the issue.
Contents
- 1 Troubleshooting Eureka Cordless Vacuum Not Charging
- 2 1. Checking the Power Connection
- 3 2. Testing the Power Outlet
- 4 3. Checking the Charger
- 5 4. Replacing the Power Adapter
- 6 5. Cleaning the Charging Port
- 7 6. Inspecting the Battery
- 8 7. Replacing the Battery
- 9 8. Replacing the Charging Circuit Board
- 10 FAQs
- 11 1. How Long Does It Typically Take for the Eureka Cordless Vacuum to Fully Charge?
- 12 2. Can I Use a Different Power Adapter to Charge My Eureka Cordless Vacuum?
- 13 3. What Should I Do if the Vacuum Still Doesn’t Charge After Cleaning the Charging Port?
- 14 4. Is It Normal for the Eureka Cordless Vacuum Battery to Degrade Over Time?
- 15 5. Why Is My Cordless Vacuum Not Charging?
- 16 6. How Do I Know if My Eureka Vacuum Is Charging?
- 17 7. Why Won’t My Eureka Vacuum Turn On?
- 18 8. How Long Do Cordless Vacuum Batteries Last?
Troubleshooting Eureka Cordless Vacuum Not Charging
Here are several troubleshooting steps you can take to identify and resolve the not charging issue in your vacuum.
1. Checking the Power Connection
The first thing to do is to ensure that the power cord is securely plugged into the charging dock. It’s possible that accidental tugging or movement might have loosened the connection.
Carefully inspect the cord for any signs of disconnection or looseness. If you find any, unplug the cord and plug it back in firmly to establish a secure connection.
This step often resolves charging problems caused by minor connection issues.

2. Testing the Power Outlet
Inspect the power outlet where the charging dock is currently plugged in. To determine if the outlet is functioning correctly, plug in another device or appliance and see if it receives power.
If the outlet is not working, try using a different one that you know is functional. A faulty power outlet could be the reason behind the vacuum not charging.
May You Like Reading:
- Miele Vacuum Not Turning On – Here’s What To Do [12 Steps]
- Bissell CrossWave Not Charging – Try These 12 Essential Fixes
3. Checking the Charger
Ensure that the charger you’re using is compatible with your specific Eureka Cordless Vacuum model. Check the charger and its cable for any physical damage or fraying that might hinder proper charging.
Testing the charger with another device can help verify its functionality
4. Replacing the Power Adapter
Inspect the power adapter for visible damage or any loose connections. If it seems fine, try using it in a different power outlet to eliminate the possibility of a faulty power source.
If you have access to a multimeter, test the voltage output of the adapter to ensure it matches the manufacturer’s specifications.
If none of these steps resolve the issue, consider obtaining a new power adapter compatible with your Eureka Cordless Vacuum model or reach out to Eureka’s customer support.
Read Blog Post: Shark Robot Not Connecting To Wi-Fi? 12 Simple Ways To Fix It
5. Cleaning the Charging Port
Examine the charging port on your Eureka Cordless Vacuum for any debris or dust accumulation. If there’s visible dirt obstructing the connection, use compressed air to gently blow away the particles.
This can often restore proper charging functionality by ensuring a clean and unobstructed connection. If the vacuum still doesn’t charge after cleaning the port, consider proceeding to the next step.
6. Inspecting the Battery
Now, taking a closer look at your vacuum’s battery can provide valuable insights into resolving charging problems.
Here are key considerations to troubleshoot the issue:
1. Battery Lifespan and Charging Requirements:
Understand the expected lifespan. If the battery is older and shows signs of decreased performance, it might be a contributing factor to the charging problem.
Also Read: Dyson Vacuum Not Charging – Let’s Resolve It [11 Steps To Follow]
2. Cleaning Battery Contacts
Check if the battery contacts are clean. Dust, dirt, and oxidation can accumulate over time, hindering the connection between the battery and the charging mechanism.
Properly cleaned contacts can improve charging efficiency and extend the battery’s overall lifespan.
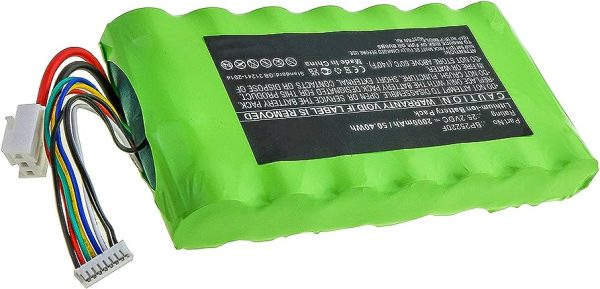
7. Replacing the Battery
If you’ve determined that the battery in your Eureka Cordless Vacuum is no longer functioning properly due to age or damage, it might be unable to retain a charge effectively.
Replacing the battery can breathe new life into your vacuum and restore its charging capability.
To replace the battery:
- Identify the specific battery model that is compatible with your Eureka Cordless Vacuum. This information can usually be found in the vacuum’s manual or on Eureka’s official website.
- Purchase a replacement battery either directly from Eureka or from reputable third-party retailers.
- Follow the manufacturer’s instructions for replacing the battery. This often involves removing a cover or panel to access the battery compartment and safely swapping out the old battery with the new one.
8. Replacing the Charging Circuit Board
The circuit board in your vacuum is responsible for managing various functions, including the charging process.
If the circuit board becomes damaged or malfunctions, it can disrupt the charging process and prevent your vacuum from charging properly.
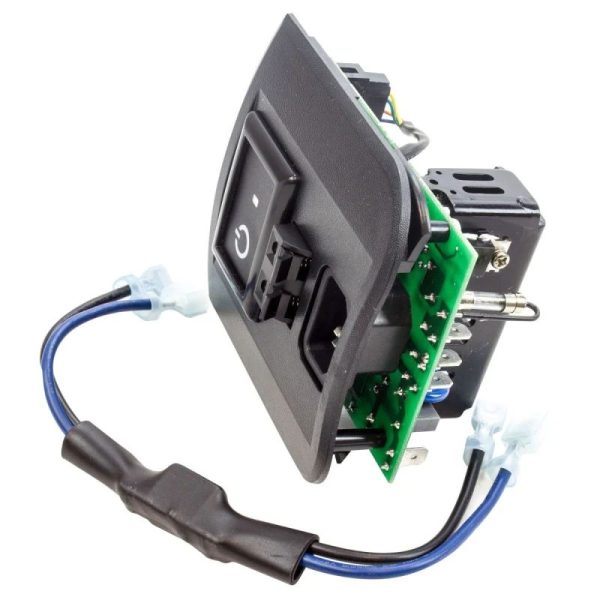
To replace the circuit board:
- Identify the correct replacement circuit board for your specific Eureka Cordless Vacuum model.
- This information can be obtained from Eureka’s official resources or customer support.
- Purchase the replacement circuit board from Eureka or trusted third-party sellers.
- Carefully disassemble your vacuum to access the circuit board.
- This typically involves removing screws and components to reach the internal electronics.
- Disconnect the old circuit board and replace it with the new one.
- Take note of the connections and wiring to ensure proper installation.
- Reassemble the vacuum following the reverse steps of disassembly.
If you’re unsure about performing these tasks yourself, consider seeking assistance from a professional technician or contacting Eureka’s customer support for guidance.
Trending Blog Posts:
FAQs
1. How Long Does It Typically Take for the Eureka Cordless Vacuum to Fully Charge?
Typically, it takes about 4-6 hours for the Eureka cordless vacuum to fully charge. Make sure you connect it properly to the charger and let it sit undisturbed until it reaches full charge.
2. Can I Use a Different Power Adapter to Charge My Eureka Cordless Vacuum?
Yes, you can use a different power adapter to charge your Eureka cordless vacuum. However, make sure the voltage and amperage of the adapter match the requirements of the vacuum for safe charging.
3. What Should I Do if the Vacuum Still Doesn’t Charge After Cleaning the Charging Port?
If the vacuum still doesn’t charge after cleaning the charging port, try using a different power adapter. Sometimes the issue lies with the adapter rather than the vacuum itself.
4. Is It Normal for the Eureka Cordless Vacuum Battery to Degrade Over Time?
Yes, it is normal for the Eureka cordless vacuum battery to degrade over time. Batteries naturally wear out and lose their ability to hold a charge as they age.
5. Why Is My Cordless Vacuum Not Charging?
The cordless vacuum might not be charging because of Loose connections, corrosion on contacts, faulty outlet, defective adapter, or battery health issues.
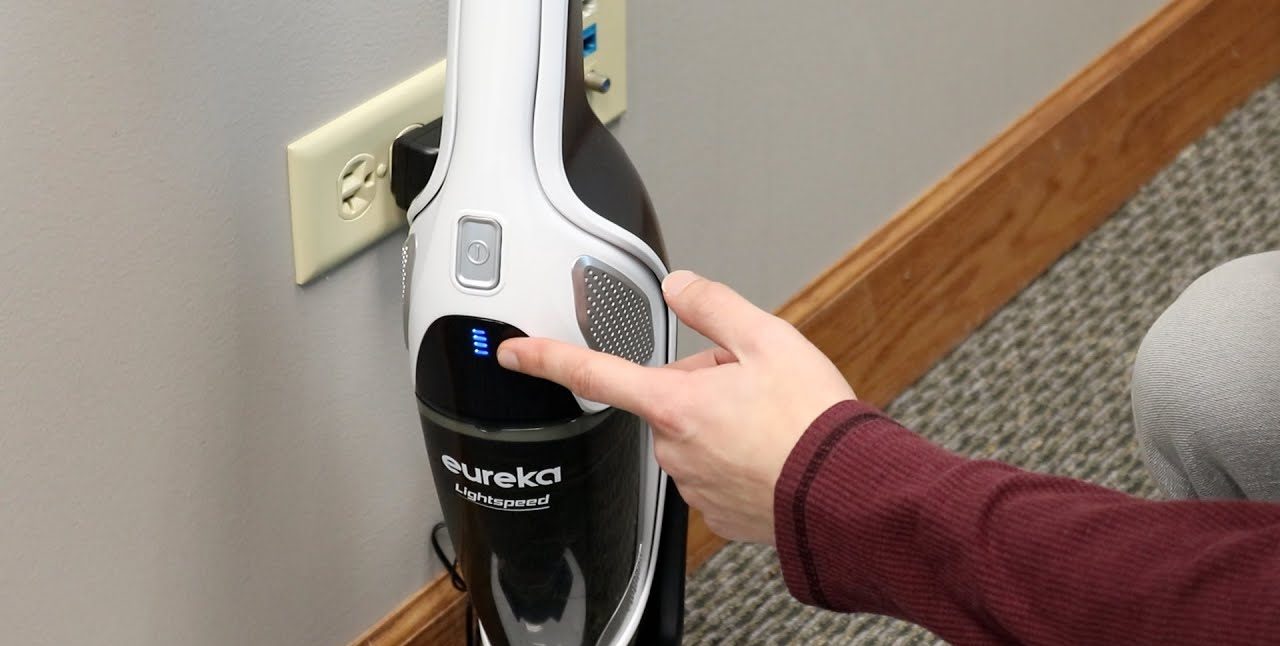
6. How Do I Know if My Eureka Vacuum Is Charging?
Look for a charging indicator light on the vacuum or its base. Refer to your vacuum’s manual for specific details.
7. Why Won’t My Eureka Vacuum Turn On?
Check battery charge, insertion, and power button. If still not working, consider internal issues and seek professional help if needed.
8. How Long Do Cordless Vacuum Batteries Last?
Cordless vacuum batteries last around 2-5 years on average. Maintenance and proper usage can extend their lifespan. Replacement might be necessary when capacity drops significantly.

John Paul is a tech enthusiast dedicated to troubleshooting. He is passionate about fixing glitches, simplifying complexities, and empowering others in the digital realm.