Roomba, the intelligent and efficient robotic vacuum cleaner, has revolutionized the way we maintain our homes.
However, like any electronic device, Roomba may encounter occasional hiccups, and one of the most frustrating issues users might face is Roomba not charging as expected.
We’ll delve into the common reasons why your Roomba not charging and provide practical troubleshooting steps to get it back to its full cleaning potential.
Contents
- 1 12 Common Causes Behind Roomba Not Charging
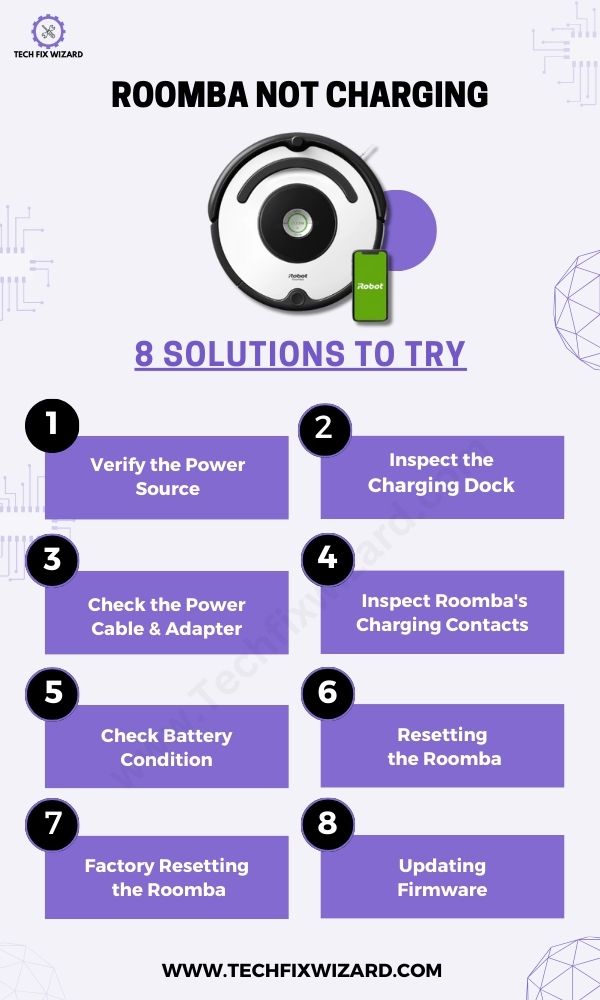
- 2 Fixing Roomba Not Charging in 8 Effective Steps
- 3 1. Verify the Power Source
- 4 2. Inspect the Charging Dock
- 5 3. Check the Power Cable and Adapter
- 6 4. Inspect Roomba’s Charging Contacts
- 7 5. Check Battery Condition
- 8 6. Resetting the Roomba
- 9 7. Factory Resetting the Roomba
- 10 8. Updating Firmware (if applicable)
- 11 Maintenance Tips for Peak Performance of Roomba
- 12 FAQs
- 13 1. Why is my Roomba not charging?
- 14 2. How can I check if the charging base is dirty?
- 15 3. What should I do if my Roomba is not docking properly on the charging base?
- 16 4. How can I determine if the power adapter is faulty?
- 17 5. My Roomba shows a charging error on the display. What does it mean?
- 18 6. Can a faulty battery cause charge problems?
- 19 7. How long should I charge my Roomba for optimal performance?
- 20 8. Why does my Roomba stop charging midway through the process?
- 21 9. My Roomba is new, but it still won’t charge. What should I do?
12 Common Causes Behind Roomba Not Charging
| No. | Causes | Explanation |
|---|---|---|
| 1. | Power outlet issues | The power outlet being used may not be functional or has electrical problems like a tripped circuit breaker or blown fuse. |
| 2. | Damaged power cable or adapter | A damaged power cable or adapter can result in poor connections and prevent the Roomba from charging properly. |
| 3. | Dirty charging contacts | Accumulated dirt, dust, or debris on the charging contacts of the Roomba or the charging dock can hinder effective charging. |
| 4. | Battery health | The Roomba’s battery may have degraded over time, reducing its capacity to hold a charge or not charging at all. |
| 5. | Charging dock issues | Physical damage, loose wires, or obstructions on the charging dock can hinder proper charging. |
| 7. | Outdated firmware | Firmware that is outdated or corrupted may cause charging-related issues, and updating it can resolve the problem. |
| 12. | The battery is not properly seated | The Roomba’s battery might not be securely seated or making proper contact with the internal connectors. |
Also Read: Shark Robot Not Connecting To Wi-Fi? 12 Simple Ways To Fix It
Fixing Roomba Not Charging in 8 Effective Steps
Now, let’s start the troubleshooting process to fix the Roomba not charging issue and get your trusty cleaning companion back up and running.
1. Verify the Power Source
Plug in another device, such as a lamp or phone charger, into the same power outlet to ensure that it is functioning correctly. If the alternate device receives power, the outlet is not the problem.
However, if the outlet is not working, try a different one and make sure it is supplying power and hasn’t tripped a circuit breaker or blown a fuse.

2. Inspect the Charging Dock
If the battery seems to be in good condition, focus on the charging dock. Examine the dock for any physical damages, loose wires, or visible issues that may be affecting the Roomba’s charging.
- Check the charging contacts on the dock for any obstructions or dirt.
- Ensure the charging dock is placed on a level surface and not obstructed by any objects.
3. Check the Power Cable and Adapter
Next, inspect the power cable and adapter to identify any visible damages, such as cuts, tears, or exposed wires. Ensure that the cable is securely plugged into both the power outlet and the charging dock or base station.
A loose connection can prevent the Roomba from charging correctly, so double-check the connections for a snug fit.
4. Inspect Roomba’s Charging Contacts
If the power source and cable appear to be working fine, the next step is to examine the charging contacts on both the Roomba and the charging dock.
Over time, these contacts can accumulate dirt, dust, or debris, leading to poor connections. To ensure proper charging:
- Turn off the Roomba.
- Examine the charging contacts on both the Roomba and the charging dock.
- Gently clean the contacts.
You Might Like Reading: Shark Robot Vacuum Not Charging? Here’s What You Need to Do
5. Check Battery Condition
To eliminate a faulty battery as the potential cause of the problem, first, ensure the battery is properly inserted back into the Roomba. A loose or improperly inserted battery may lead to charging issues.
Confirm that it is securely placed in its designated compartment before proceeding with further troubleshooting steps.
Also, check the battery’s health. If your Roomba model has a removable battery, turn off the Roomba and follow the user manual to remove it.
Examine the battery for any signs of damage, leakage, or swelling. If you have access to a battery health checker, use it to assess the battery’s condition. If you find out the poor battery health consider replacing it.
For additional assistance in evaluating the battery’s health or if you are uncertain about its condition, don’t hesitate to contact Roomba support.
You Might Also Like: ILIFE Robot Vacuum Not Charging – 10 Steps To Revive Charging
6. Resetting the Roomba
If the previous steps haven’t resolved the issue, try performing a soft reset on the Roomba. This action will clear any minor glitches and reset the charging system.
1. Check your Roomba Model:
Identify your Roomba model to determine the appropriate reset method. Different models have different reset procedures, so refer to the user guide if you’re unsure about your Roomba’s model.
2. For S, I, and 900 Series Roombas:
If you own a Roomba from the S, I, or 900 Series, follow these steps:
- Simultaneously hold the Home, Spot Clean, and Clean buttons on your Roomba.
- Keep holding the buttons until you see a light appear around the Clean button.
- Release the buttons once the light appears.
3. For 600 or 800 Series Roombas:
If you have a Roomba from the 600 or 800 Series, use these steps:
- Press the Home, Spot Clean, and Clean buttons on your Roomba simultaneously.
- Wait until you hear the vacuum beep.
- Release the buttons after the beep.
After performing the reset, your Roomba will indicate that the reset was successful. It may play a sound or show a specific light pattern to confirm the reset. The reset should clear any minor glitches or issues that were affecting your Roomba’s operation.
Quick Read: Lefant Robot Vacuum Not Charging – 7 Steps To Fix It
7. Factory Resetting the Roomba
If a soft reset doesn’t resolve the issue, try performing a hard reset, which can sometimes be more effective.
1. Factory Reset through the App:
For factory resetting your Roomba through the app, you can follow the steps below:
- Launch the iRobot HOME App and confirm that your mobile device is connected to the same Wi-Fi network as your Roomba.
- Navigate to the Product Settings section and locate your Roomba under About (robot name).
- Scroll down and select Remove Device from Account to begin the factory reset process.
By following these steps, you can perform a factory reset on your Roomba using the iRobot HOME App, ensuring a fresh start for your Wi-Fi-connected robot.
2. Factory Reset on Wi-Fi Connected Roomba Robots:
For the Roomba robots connecting to Wi-Fi, you can follow the steps given for each model in the table below:
| No. | Roomba Model | Factory Reset Procedure |
|---|---|---|
| 1. | s Series and i Series | Simultaneously press and hold the Home, Spot Clean, and CLEAN buttons until you see the white light ring around the CLEAN button swirling. |
| 2. | j Series | Take out the dustbin, then press and hold the CLEAN button for seven (7) seconds until your Roomba emits a tone. Tap the CLEAN button once more to confirm the reset. |
| 3. | e Series | Press and hold the Home, Spot Clean, and CLEAN buttons together for 20 seconds, and then release. |
| 4. | 900 Series | Simultaneously press and hold the Dock, Spot Clean, and CLEAN buttons until all LEDs illuminate. |
| 5. | Wi-Fi Connected 600 & 800 | Press and hold the Dock, Spot Clean, and CLEAN buttons together until your Roomba emits a beep tone, and then release. |
| 6. | Roomba Combo | Open the lid of the Roomba Combo, find the recessed Reset button located to the left of the On/Off switch, and press and hold the Reset button for ten seconds. |
8. Updating Firmware (if applicable)
If your Roomba has firmware update capabilities, consider updating it to address any software-related issues that might be affecting charging.
- Check for firmware updates on the official Roomba website or through the Roomba app (if available).
- Download and install any available updates following the provided instructions.
- Restart the Roomba to see if the charging issue is resolved.
By following these step-by-step instructions and eliminating potential issues one by one, you can identify and resolve the Roomba not charging problem.
If the issue persists, consider contacting Roomba support or seeking professional repair services for further assistance.
People Also Liked: ECOVACS DEEBOT Not Charging – Effective Troubleshooting & Fixes
Maintenance Tips for Peak Performance of Roomba
Maintaining your Roomba robot is vital for peak performance and durability. Here are key maintenance tips:
- Clean Regularly: After each use, clean brushes, rollers, and filters to prevent clogs.
- Check Charging Contacts: Ensure clean and proper connections for efficient charging.
- Replace Consumables: Change filters and brushes every few months for optimal cleaning.
- Clear Sensors: Keep sensors clean and unobstructed for accurate navigation.
- Empty Dustbin: Empty it after every cycle to maintain suction power.
- Inspect Wheels/Casters: Clean and check for smooth movement.
- Accessible Charging Dock: Place it in an easily accessible location.
- Update Software: Stay updated on the latest features and improvements.
- Proper Storage: Store in a cool, dry place away from direct sunlight.
Our Popular Picks: Roborock Not Charging – 10 Effective Steps To Troubleshoot & Fix
FAQs
1. Why is my Roomba not charging?
There could be several reasons for this issue. The most common ones are a dirty charging base, a faulty power adapter, or a malfunctioning battery.
2. How can I check if the charging base is dirty?
Inspect the charging contacts on both the Roomba and the base for any dust, debris, or residue. Clean them gently with a soft, dry cloth to ensure a good connection.
3. What should I do if my Roomba is not docking properly on the charging base?
Make sure the charging base is placed on a flat surface and no obstacles are blocking the Roomba from docking properly. Also, verify that the charging contacts are clean and free from dirt.
4. How can I determine if the power adapter is faulty?
Test the power adapter with another compatible device to see if it functions correctly. If it doesn’t charge the other device, the power adapter may be defective and needs replacement.
5. My Roomba shows a charging error on the display. What does it mean?
Charging errors often indicate a communication problem between the Roomba and the charging base. Check for obstructions, clean the contacts, or try repositioning the base to fix the issue.
6. Can a faulty battery cause charge problems?
Yes, a degraded or worn-out battery may prevent the Roomba from charging properly. If your Roomba is an older model, consider replacing the battery.
7. How long should I charge my Roomba for optimal performance?
The charging time varies depending on the model, but it is generally recommended to charge the Roomba for at least 2-3 hours for a full charge.
8. Why does my Roomba stop charging midway through the process?
This could be a sign of a loose connection between the Roomba and the charging base. Ensure that the Roomba is correctly seated on the base, and the contacts are aligned.
9. My Roomba is new, but it still won’t charge. What should I do?
Look for any protective stickers or tabs that might be covering the charging contacts. Remove them if present, as they may prevent proper charging.

John Paul is a tech enthusiast dedicated to troubleshooting. He is passionate about fixing glitches, simplifying complexities, and empowering others in the digital realm.

